> ## Documentation Index
> Fetch the complete documentation index at: https://docs.theoptimizer.io/llms.txt
> Use this file to discover all available pages before exploring further.
# Connect Facebook
> Authorise TheOptimizer to access your Facebook ad accounts using a Business profile, Personal profile, or Access Token.
export const ArcadeVideoButton = ({id, title = "Watch interactive demo", label = "Watch Video"}) => {
const [open, setOpen] = useState(false);
return
;
};
TheOptimizer supports three ways to connect Facebook. Choose the one that matches your setup:
| Method | Best for |
| ---------------------------------- | ---------------------------------------------------------------------------------------------------------------------------------------------------------- |
| **Business profile** (recommended) | Agencies and teams using Meta Business Suite with a System User. Provides the most stable, long-lived connection. |
| **Personal profile** | Individual users managing a limited set of ad accounts and Pages personally. Subject to standard OAuth token expiry. |
| **Access Token** | Advanced users who want to connect via a manually generated System User access token from Meta Business Suite. Full control over token scope and lifetime. |
***
## Connect with a Business or Personal Profile
From the left-hand navigation menu, go to **Integrations**. Find the **Facebook** card and click **Connect →**.
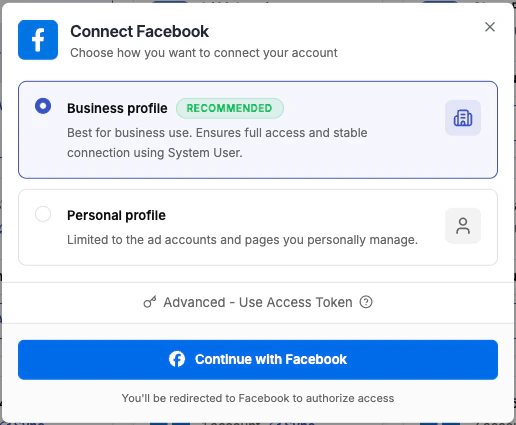
A dialog appears asking how you want to connect. Select **Business profile** (recommended) or **Personal profile**, then click **Continue with Facebook**. You will be redirected to Facebook to complete the authorisation.
Facebook will ask which Pages you want TheOptimizer to access.
Select **"Opt in to all current and future Pages."** This grants access to any Pages you create in the future, so you won't need to re-authorise every time you launch a new campaign under a new Page.
Facebook will ask which Business Managers to include. Select the Business Manager that contains the ad accounts you want to manage in TheOptimizer, then click **Continue**.
If you manage multiple Business Managers, you can connect them all at once — select each one that contains ad accounts you want TheOptimizer to access.
Facebook will show a summary of the permissions being granted. These permissions allow TheOptimizer to read campaign performance data and make changes (pause campaigns, adjust budgets, etc.) on your behalf. Review them and click **Confirm** to complete the authorisation.
TheOptimizer shows a confirmation screen with the number of ad accounts added and the integration name.
Initial sync takes **up to 20–30 minutes**. After connection, TheOptimizer starts pulling your campaign data. Campaigns and ads may not appear immediately — this is expected. Give it up to half an hour before troubleshooting.
From this screen, you can also click **Connect Tracker** to link a tracking platform to your Facebook integration right away. You can also do this later from the Integrations page.
***
## Connect with an Access Token
Use this option when you want to connect using a System User access token generated directly from Meta Business Suite. This gives you full control over which permissions are included and is not subject to standard OAuth token expiry tied to a personal login.
In Meta Business Suite, go to **Business Settings → System Users**. Select or create a System User with admin access, assign the ad accounts you want TheOptimizer to manage, then generate an access token with the following permissions:
* `pages_show_list`
* `ads_management`
* `ads_read`
* `business_management`
* `pages_read_engagement`
* `public_profile`
Copy the generated token — it will only be shown once.
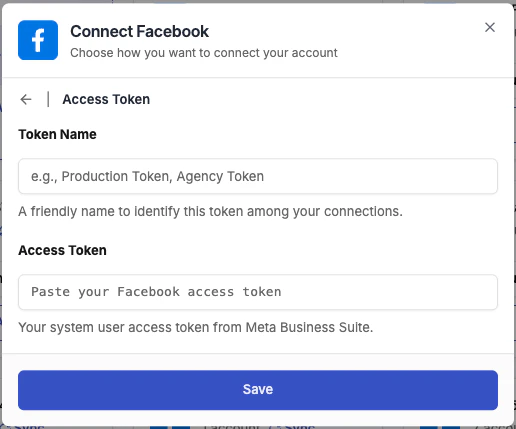
In TheOptimizer, go to **Integrations → Facebook → Connect →**. In the profile type dialog, click **Advanced — Use Access Token**.
Give the connection a recognisable name (e.g., "Production Token" or "Agency Token"), paste your access token, and click **Save**.
TheOptimizer validates the token and pulls in the ad accounts the System User has access to. Initial sync takes up to 20–30 minutes.
System User tokens generated in Meta Business Suite do not expire on password changes and are not tied to any individual's personal Facebook account, making them significantly more stable for long-running integrations.
***
## What Permissions Are Granted
TheOptimizer requests the following Facebook permissions regardless of connection method:
| Permission | Purpose |
| ----------------------- | ------------------------------------------------- |
| `pages_show_list` | List Pages available to the authenticated account |
| `ads_management` | Read and update campaigns, ad sets, and ads |
| `ads_read` | Read campaign performance metrics |
| `business_management` | Access ad accounts within Business Managers |
| `pages_read_engagement` | Read Pages (required for ad identity setup) |
| `public_profile` | Basic profile identification |
TheOptimizer does not request permission to post to your Pages, access your personal messages, or take any actions outside of ad account management.
***
## Connecting Multiple Facebook Profiles
You can connect multiple Facebook profiles to the same Facebook integration — whether Business profiles, Personal profiles, or Access Tokens. This supports teams where each member manages their own set of accounts, and provides backup access if a primary profile gets restricted.
To add a second profile, go to **Integrations → Facebook** and click **Add Profile** (or the **Connect new profile** card in the profiles panel). Complete the same connection flow with the additional login or token.
See [Manage Ad Accounts & Profiles](/ad-networks/facebook/integration/manage-accounts) for how to assign ad accounts to profiles and manage the relationship between them.
***
## Custom Events
Beyond the standard Facebook events, TheOptimizer can import **any custom event** — and its revenue — from your Facebook integration. Sync them from the **Custom Events** tab inside the integration, and use them in reporting, as conditions in rules, and in custom metrics.
See [Custom Events](/integrations/custom-events) for the full setup.
***
## Next Steps
* [Manage Ad Accounts & Profiles](/ad-networks/facebook/integration/manage-accounts) — enable/disable/archive accounts, manage profile assignments, add tags
* [Custom Events](/integrations/custom-events) — import any custom event and its revenue into reporting, rules, and custom metrics
* [Troubleshoot a Connection](/ad-networks/facebook/integration/troubleshoot) — fix token expiry, missing accounts, sync issues
 ***
## Connect with a Business or Personal Profile
***
## Connect with a Business or Personal Profile