 ### Filtering by Tags
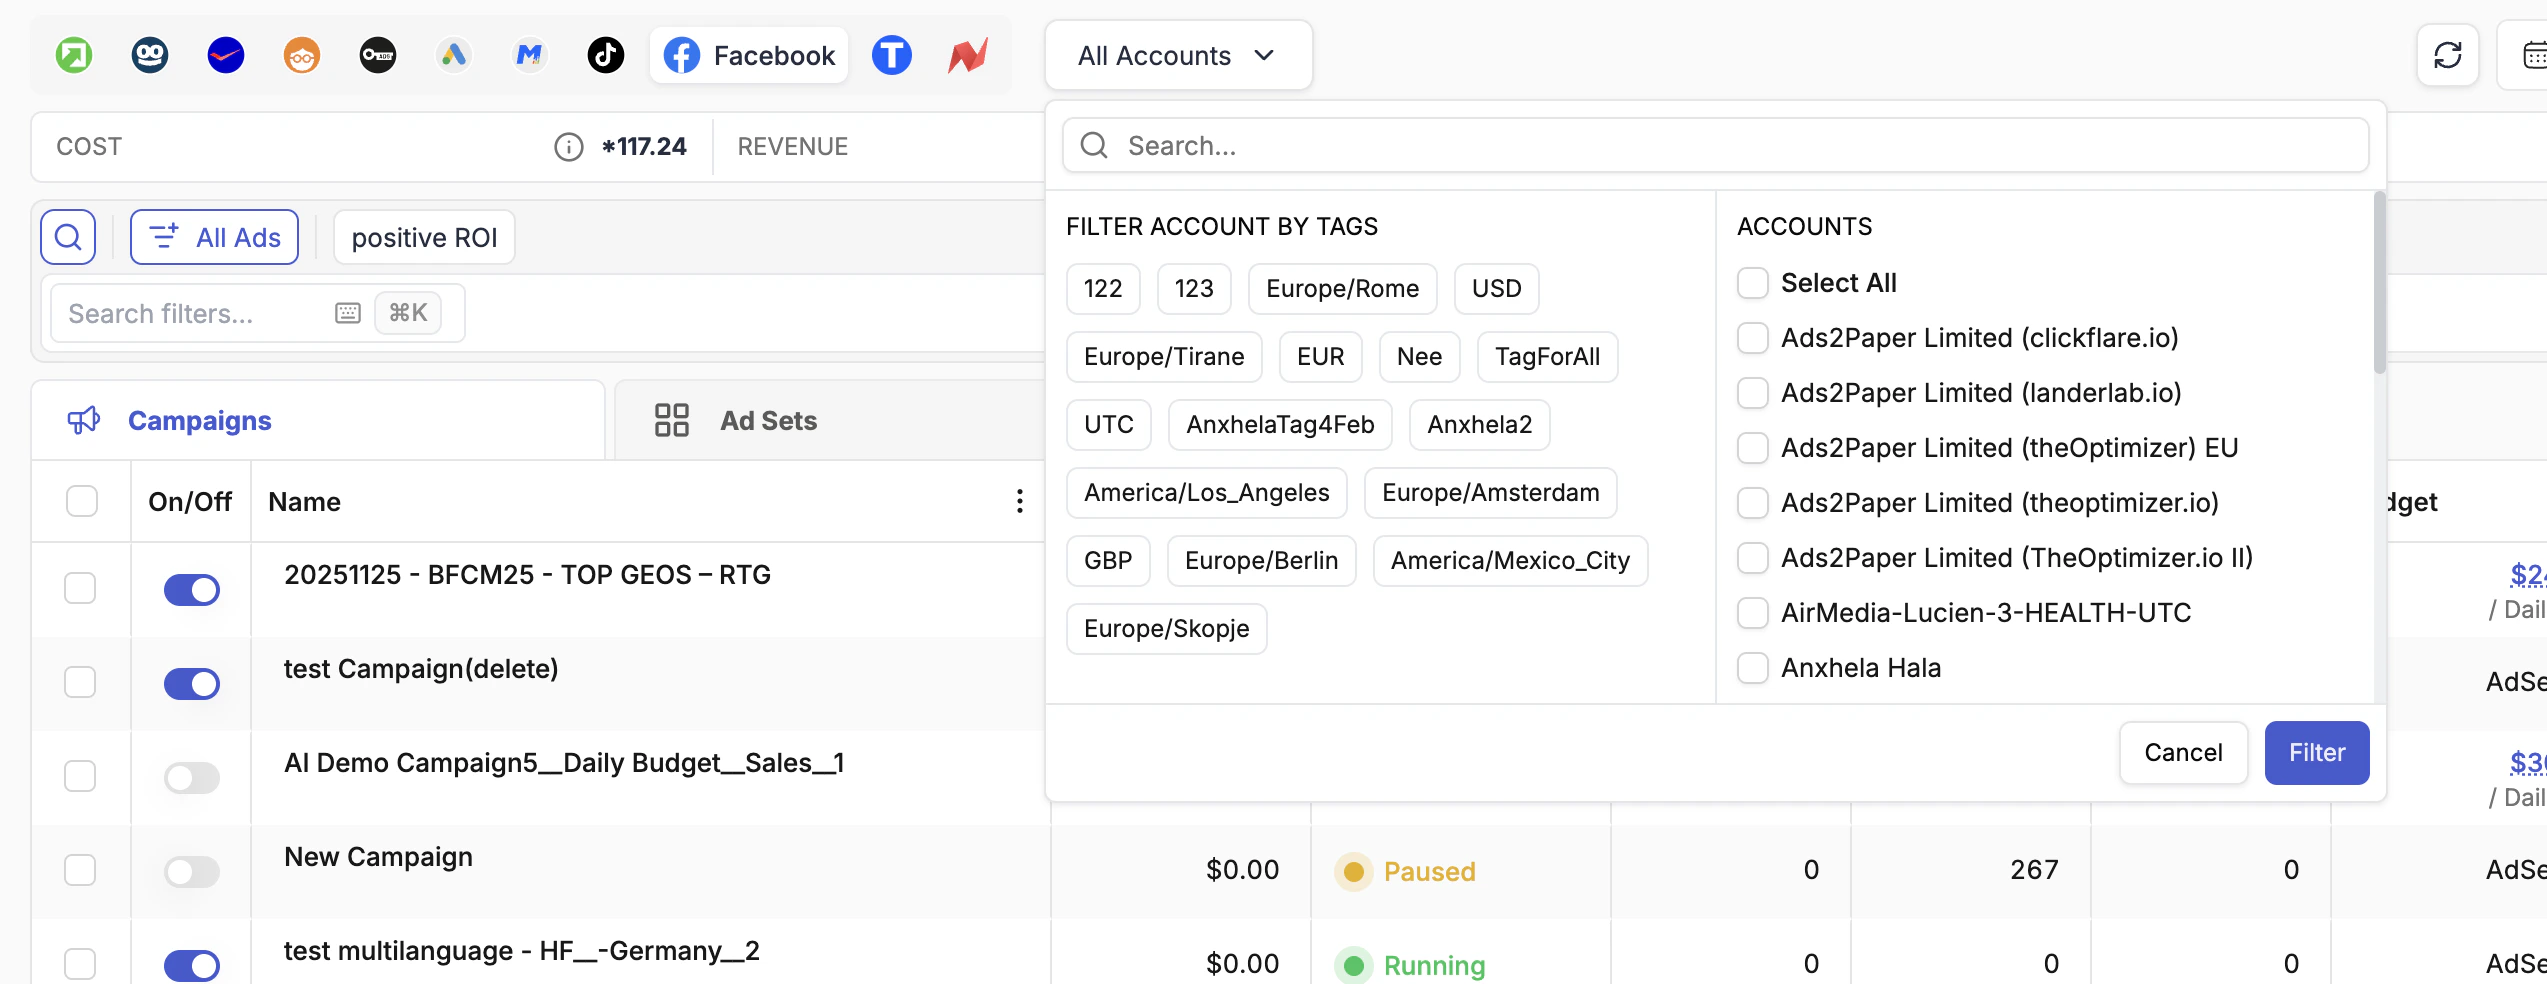
TheOptimizer automatically assigns two tags to every ad account when it is connected:
* **Timezone tag** — the time zone configured on that account (e.g., `UTC`, `America/Los_Angeles`)
* **Currency tag** — the currency of the account (e.g., `USD`, `EUR`, `GBP`)
These default tags let you instantly filter to, for example, all USD accounts or all accounts running on Eastern time. You can add your own custom tags from **Integrations → Ad Network → Ad Accounts** to create groupings that match your team structure, geo focus, or offer verticals.
### Searching for Specific Accounts
Inside the ad account filter, type to search for accounts by name. Select one or more accounts and click **Filter** to scope the Campaign Manager to only those accounts.
***
## Campaigns, Ad Sets & Ads
Three tabs sit above the main table: **Campaigns**, **Ad Sets**, and **Ads** (some networks use "Ad Groups" instead of "Ad Sets"). Each tab shows all items of that type across every selected ad account.
* Clicking a tab with **no items selected** shows all items of that type across your accounts — a cross-account view you cannot get in native ad managers.
* **Selecting one or more campaigns** on the Campaigns tab and then switching to Ad Sets filters the list to show only the ad sets belonging to those campaigns.
* **Selecting ad sets** and switching to Ads filters to show only ads within those ad sets.
This mirrors the drill-down navigation of native ad managers, but with cross-account breadth.
***
## Filters
The filtering bar sits below the Totals Bar and lets you search and filter campaigns, ad sets, or ads by virtually any metric or attribute. Click the **Search filters...** box to open the filter panel.
### Filtering by Tags
TheOptimizer automatically assigns two tags to every ad account when it is connected:
* **Timezone tag** — the time zone configured on that account (e.g., `UTC`, `America/Los_Angeles`)
* **Currency tag** — the currency of the account (e.g., `USD`, `EUR`, `GBP`)
These default tags let you instantly filter to, for example, all USD accounts or all accounts running on Eastern time. You can add your own custom tags from **Integrations → Ad Network → Ad Accounts** to create groupings that match your team structure, geo focus, or offer verticals.
### Searching for Specific Accounts
Inside the ad account filter, type to search for accounts by name. Select one or more accounts and click **Filter** to scope the Campaign Manager to only those accounts.
***
## Campaigns, Ad Sets & Ads
Three tabs sit above the main table: **Campaigns**, **Ad Sets**, and **Ads** (some networks use "Ad Groups" instead of "Ad Sets"). Each tab shows all items of that type across every selected ad account.
* Clicking a tab with **no items selected** shows all items of that type across your accounts — a cross-account view you cannot get in native ad managers.
* **Selecting one or more campaigns** on the Campaigns tab and then switching to Ad Sets filters the list to show only the ad sets belonging to those campaigns.
* **Selecting ad sets** and switching to Ads filters to show only ads within those ad sets.
This mirrors the drill-down navigation of native ad managers, but with cross-account breadth.
***
## Filters
The filtering bar sits below the Totals Bar and lets you search and filter campaigns, ad sets, or ads by virtually any metric or attribute. Click the **Search filters...** box to open the filter panel.
 ### Quick Conditions
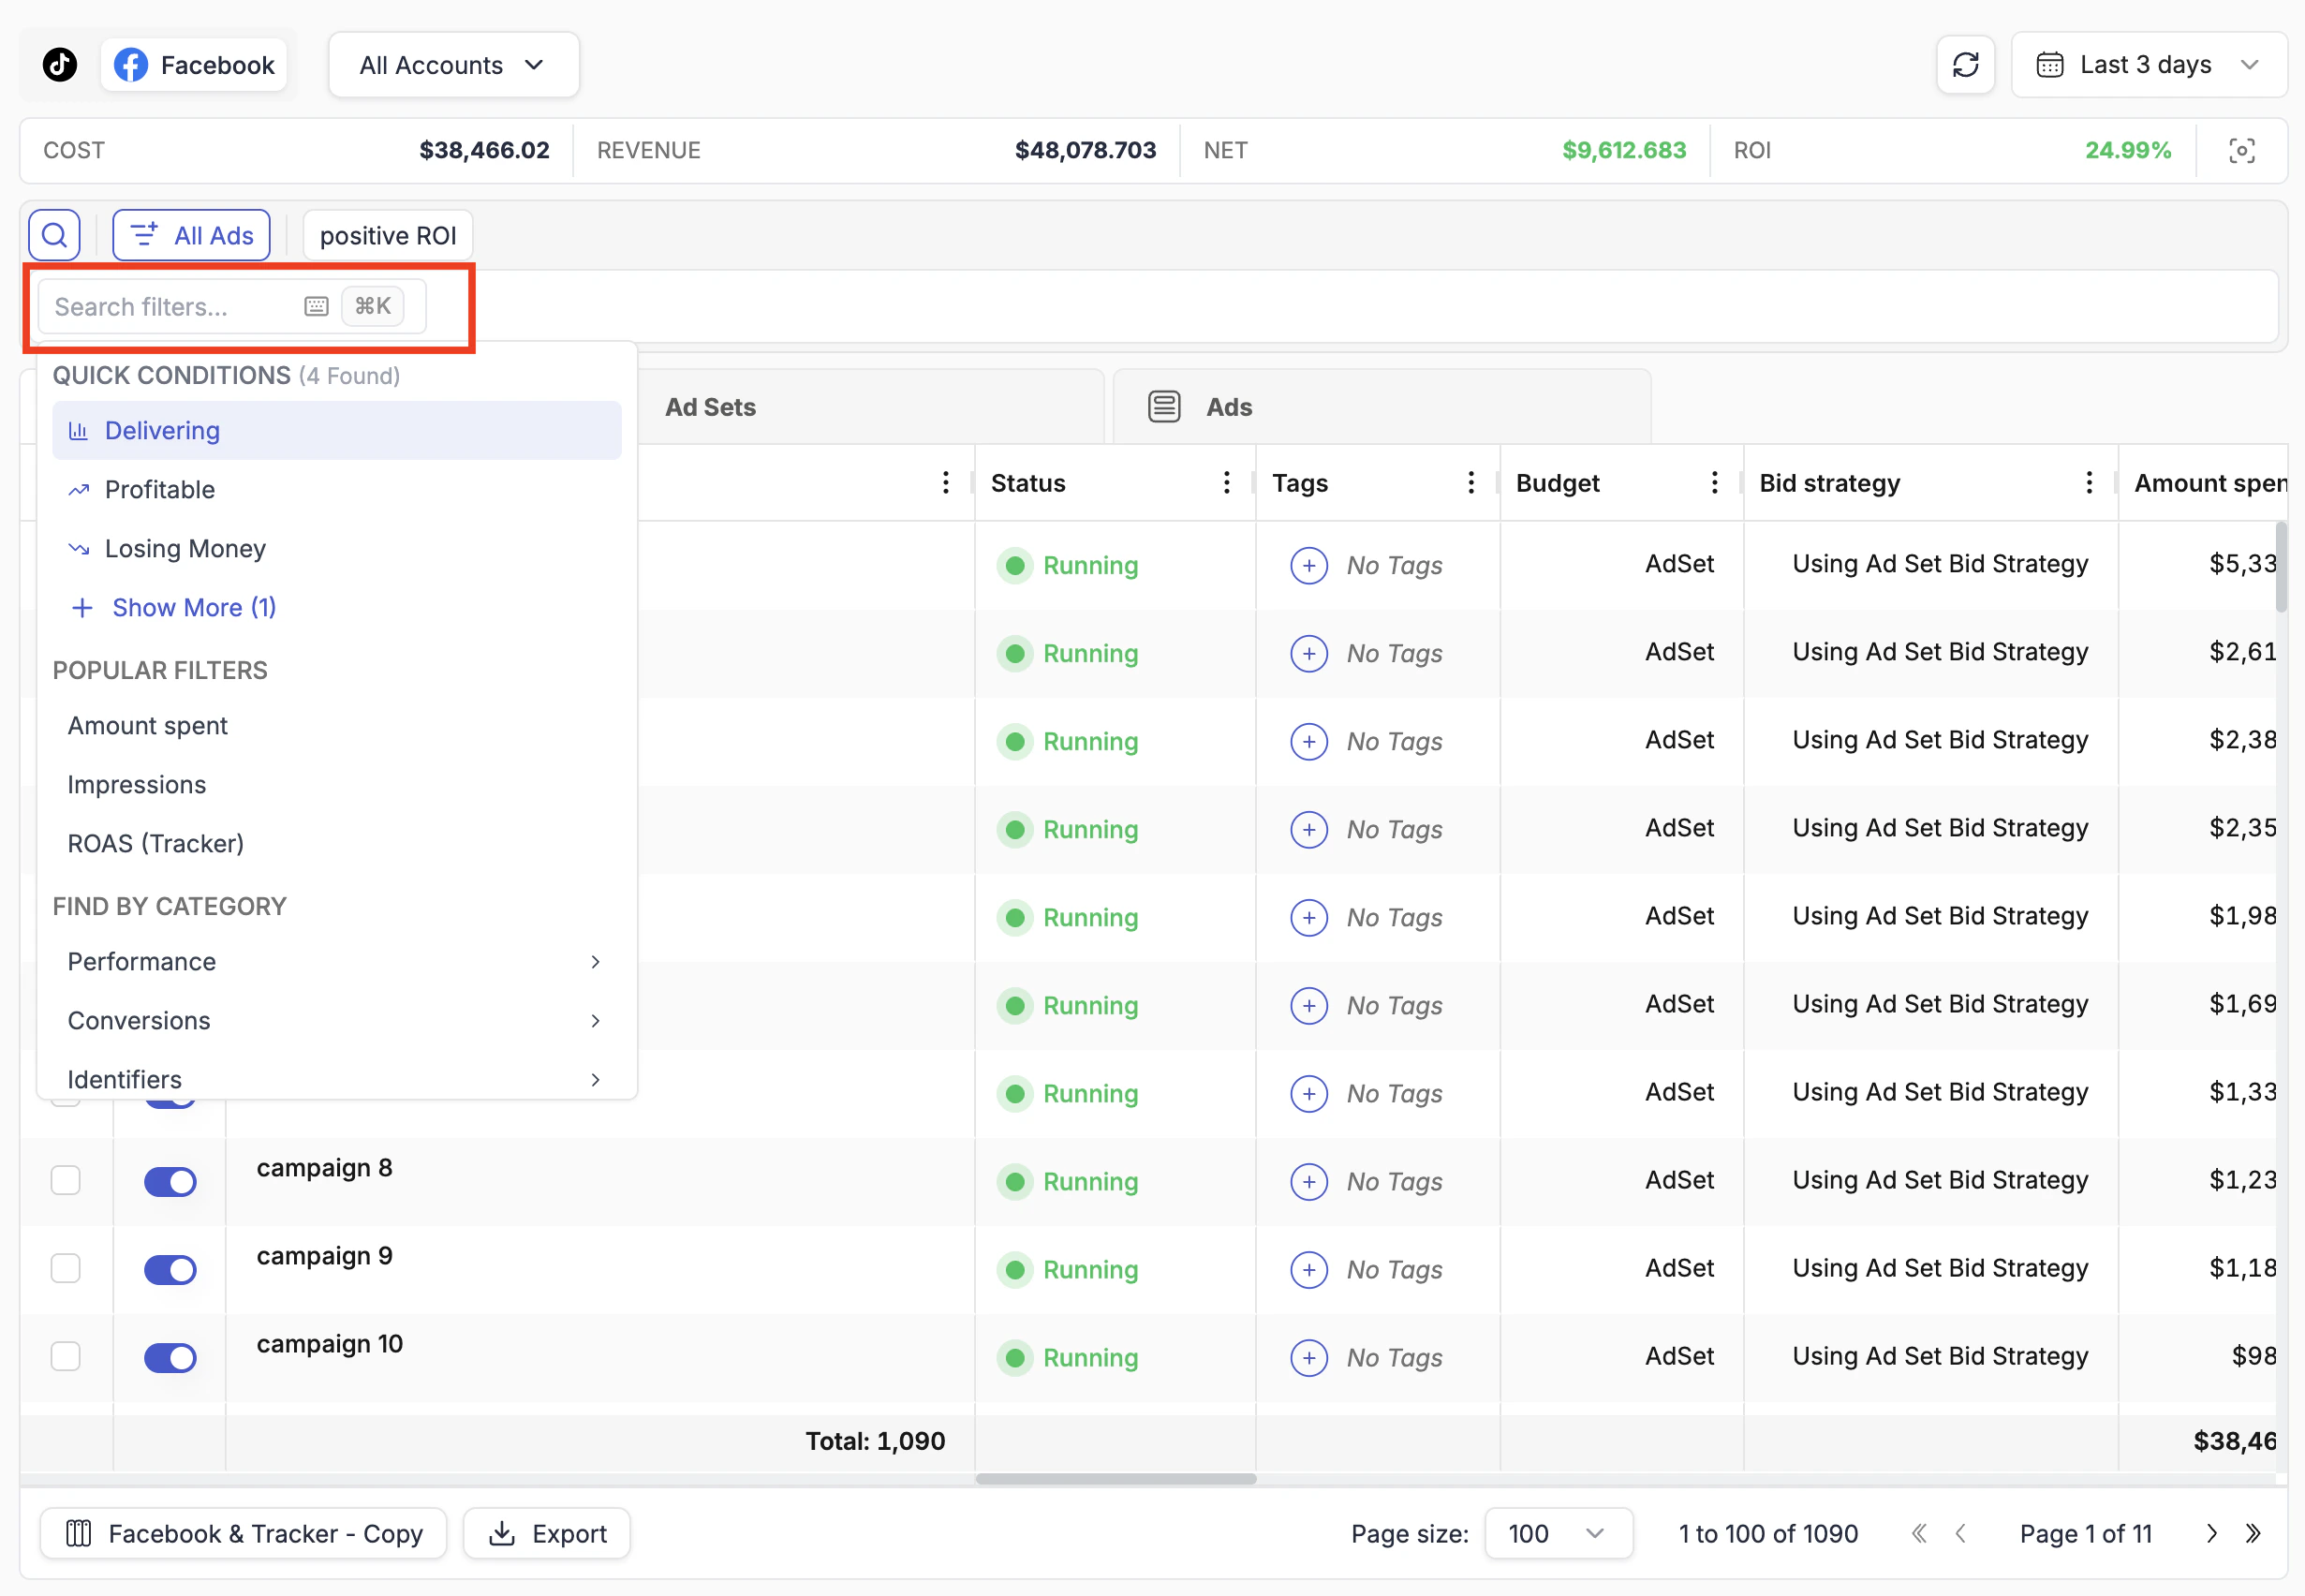
At the top of the filter panel, **Quick Conditions** are pre-built single-click presets for the most common needs:
* **Delivering** — items with Impressions > 0 (receiving active traffic)
* **Profitable** — items with NET Profit > 0
* **Losing Money** — items with NET Profit \< 0
### Popular Filters & Categories
**Popular Filters** is a dynamically generated list of the filters you use most frequently. It updates as you work, surfacing the metrics you reach for regularly.
**Find by Category** is a structured directory of all available filter metrics:
| Category | What it contains |
| --------------- | ---------------------------------------------------------------------------------------- |
| **Performance** | Spend, impressions, clicks, CTR, CPC, CPA, ROI, revenue, NET, and other core metrics |
| **Conversions** | Traffic source conversions, tracker conversions, and custom conversion events |
| **Identifiers** | Campaign, ad set, and ad names and IDs — useful for filtering to a specific item by name |
| **Other** | Tags, budgets, start dates, statuses, and other non-metric attributes |
To find a specific metric quickly, start typing in the filter search box — you do not need to browse through the categories manually.
### Saving Custom Views
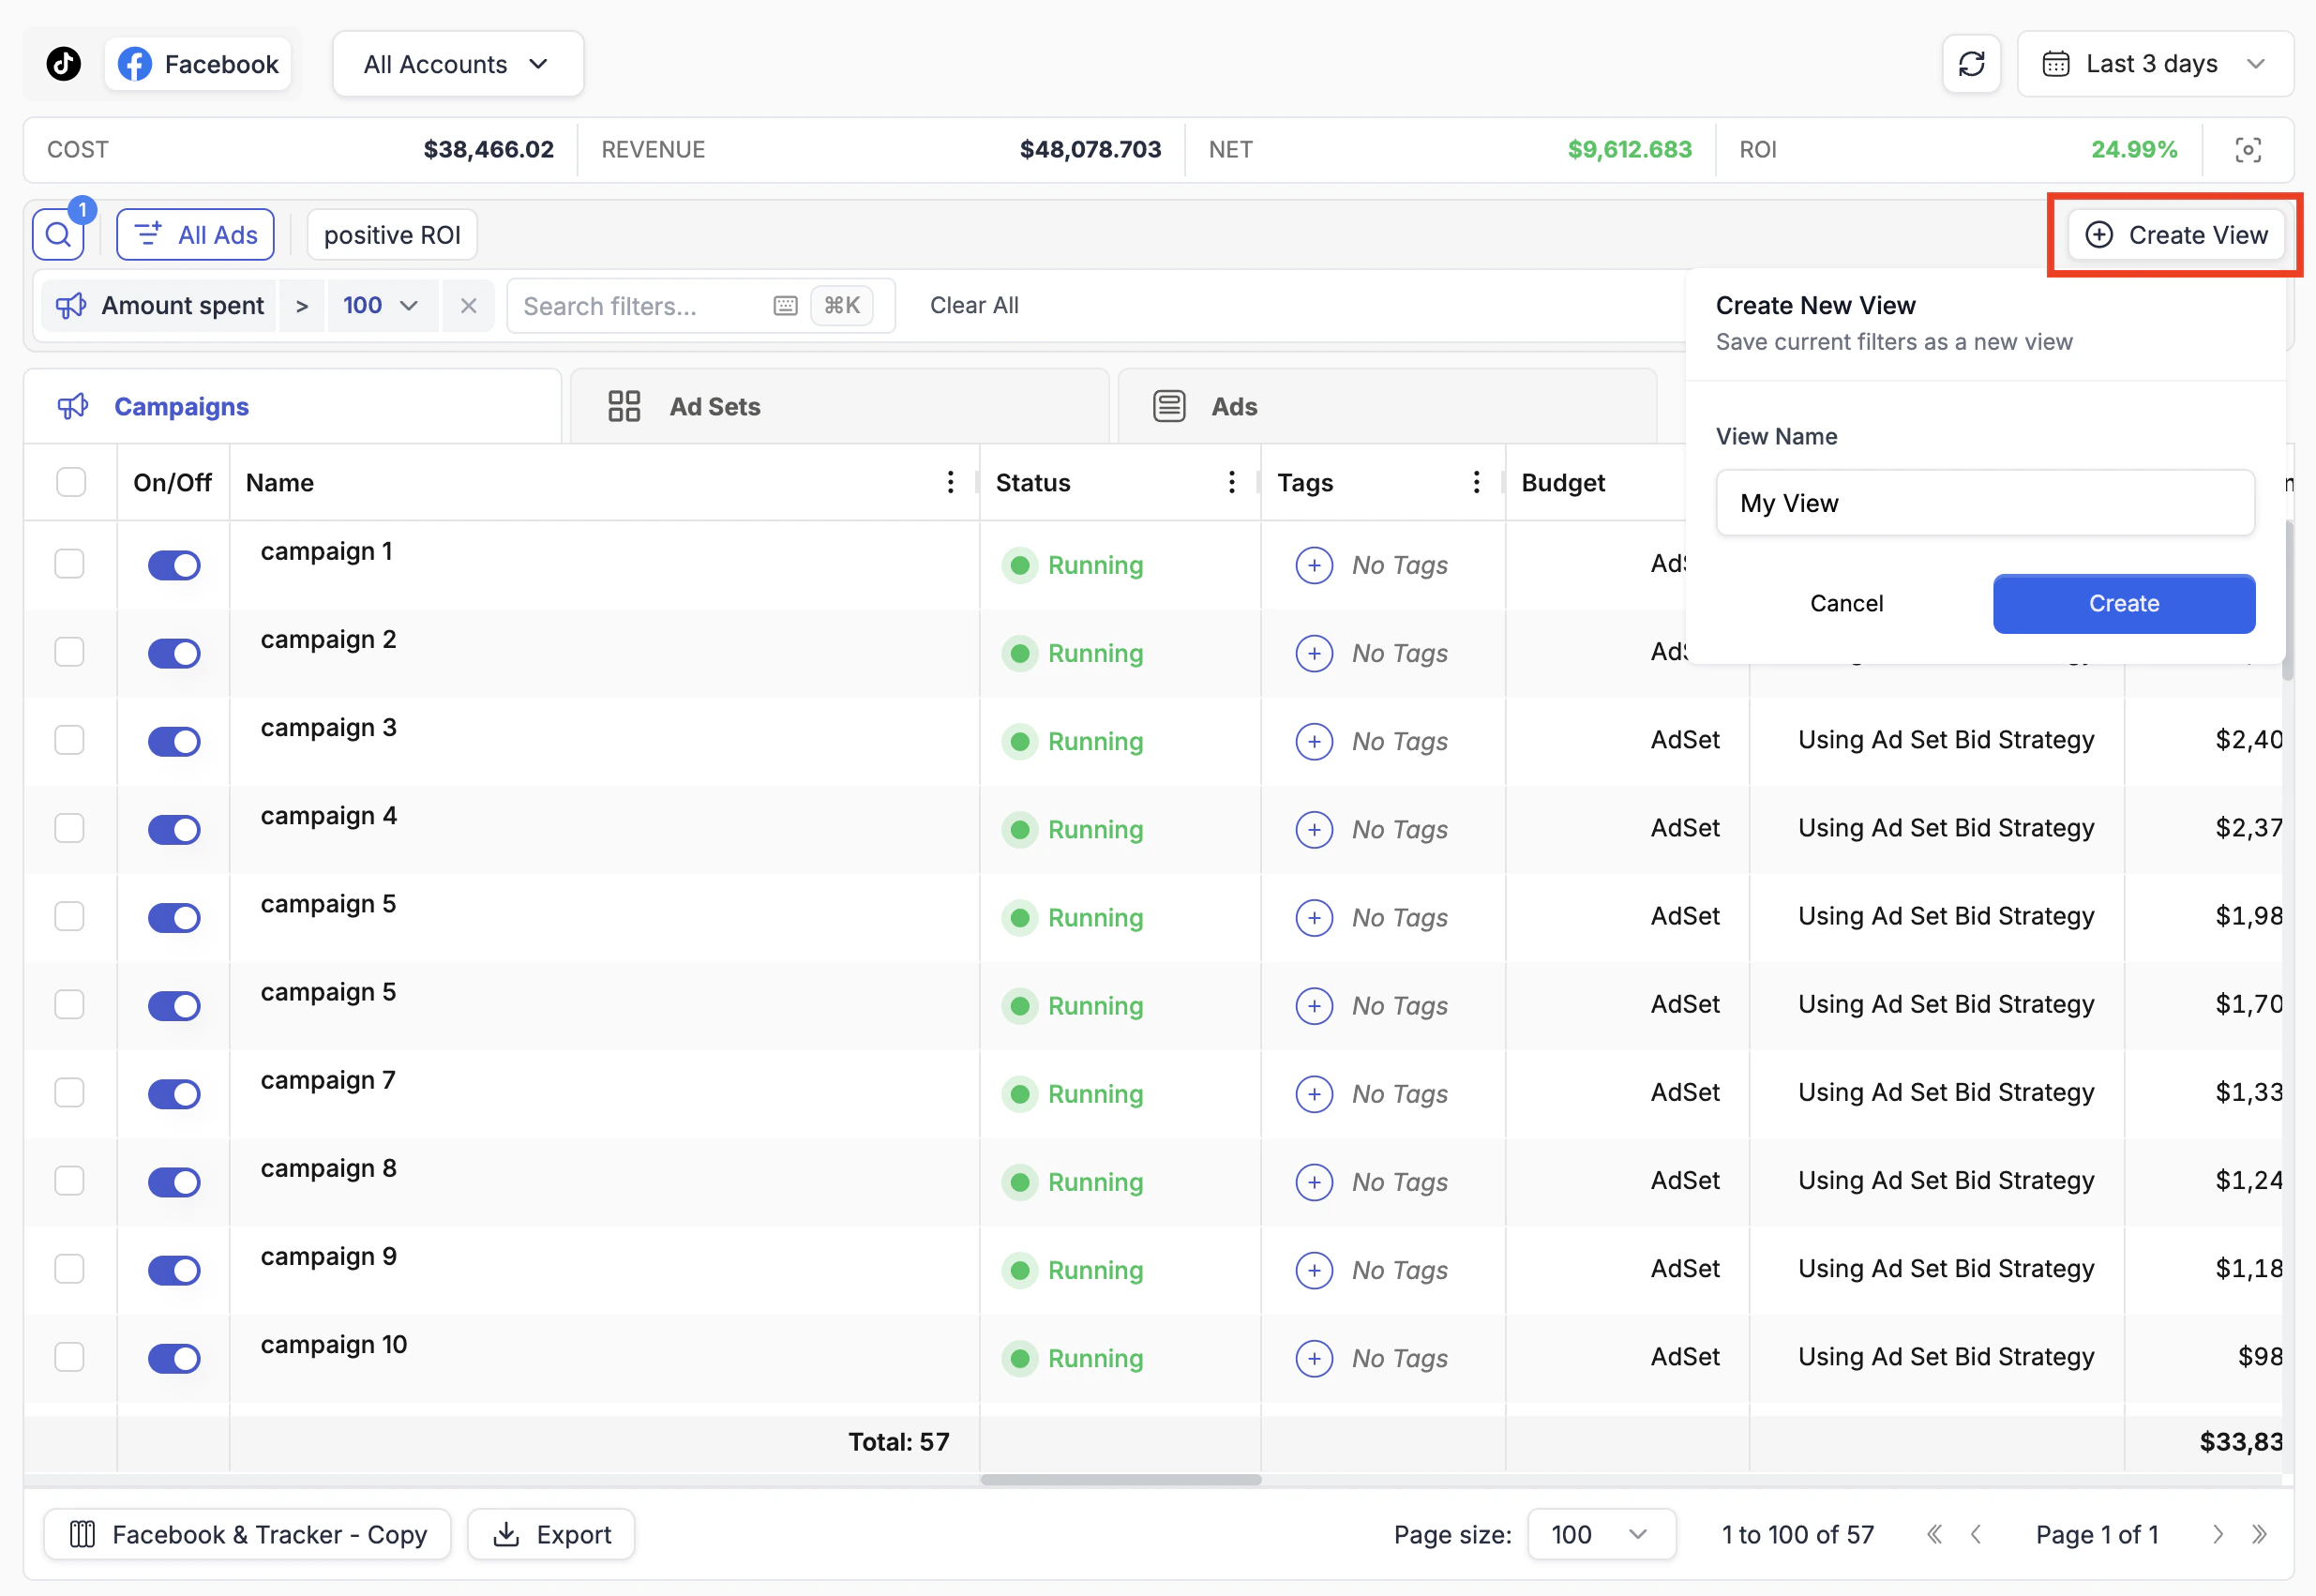
Once you have built a filter combination you want to reuse, save it as a **View**.
### Quick Conditions
At the top of the filter panel, **Quick Conditions** are pre-built single-click presets for the most common needs:
* **Delivering** — items with Impressions > 0 (receiving active traffic)
* **Profitable** — items with NET Profit > 0
* **Losing Money** — items with NET Profit \< 0
### Popular Filters & Categories
**Popular Filters** is a dynamically generated list of the filters you use most frequently. It updates as you work, surfacing the metrics you reach for regularly.
**Find by Category** is a structured directory of all available filter metrics:
| Category | What it contains |
| --------------- | ---------------------------------------------------------------------------------------- |
| **Performance** | Spend, impressions, clicks, CTR, CPC, CPA, ROI, revenue, NET, and other core metrics |
| **Conversions** | Traffic source conversions, tracker conversions, and custom conversion events |
| **Identifiers** | Campaign, ad set, and ad names and IDs — useful for filtering to a specific item by name |
| **Other** | Tags, budgets, start dates, statuses, and other non-metric attributes |
To find a specific metric quickly, start typing in the filter search box — you do not need to browse through the categories manually.
### Saving Custom Views
Once you have built a filter combination you want to reuse, save it as a **View**.