;
};
This guide walks you through the five steps to go from a new TheOptimizer account to a fully operational setup. By the end, your ad networks will be connected, your campaigns will be visible in a unified view, and you will have automation rules running to protect and optimize your spend.
The first thing you need to do is connect at least one ad network. Without this, the platform has no campaign data to work with and cannot take any actions.
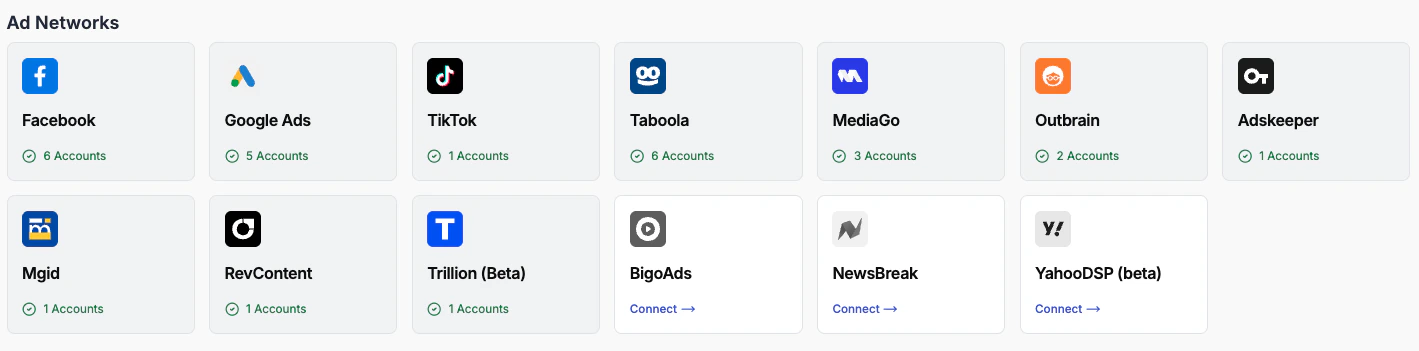
Go to **Integrations** in the left-hand menu and open the **Ad Networks** tab. You will see a grid of all supported networks. Click **Connect** on the network you want to add and follow the authorization flow.
* **Facebook, Google Ads, and TikTok** connect via OAuth — you log in with your account and grant standard ads management permissions.
* **All other networks** (Taboola, Outbrain, MGID, MediaGo, BigoAds, Adskeeper, RevContent, NewsBreak, YahooDSP, Trillion) connect via API credentials, which you generate from the ad network's own settings and paste into TheOptimizer.
Once connected, TheOptimizer automatically pulls in your campaigns, ads, and account data. If you have multiple ad accounts under the same network, they all appear under the integration and you can manage which ones are active from the **Manage Ad Accounts** section.
After connecting a new ad account, the initial data sync can take up to 20–30 minutes. If you see empty stats immediately after connecting, wait a few minutes and refresh.
You can add tags to your ad accounts (for example, by timezone or currency) from the **Integrations** section. These tags let you filter campaigns by account group with a single click from the main **Campaigns** view.
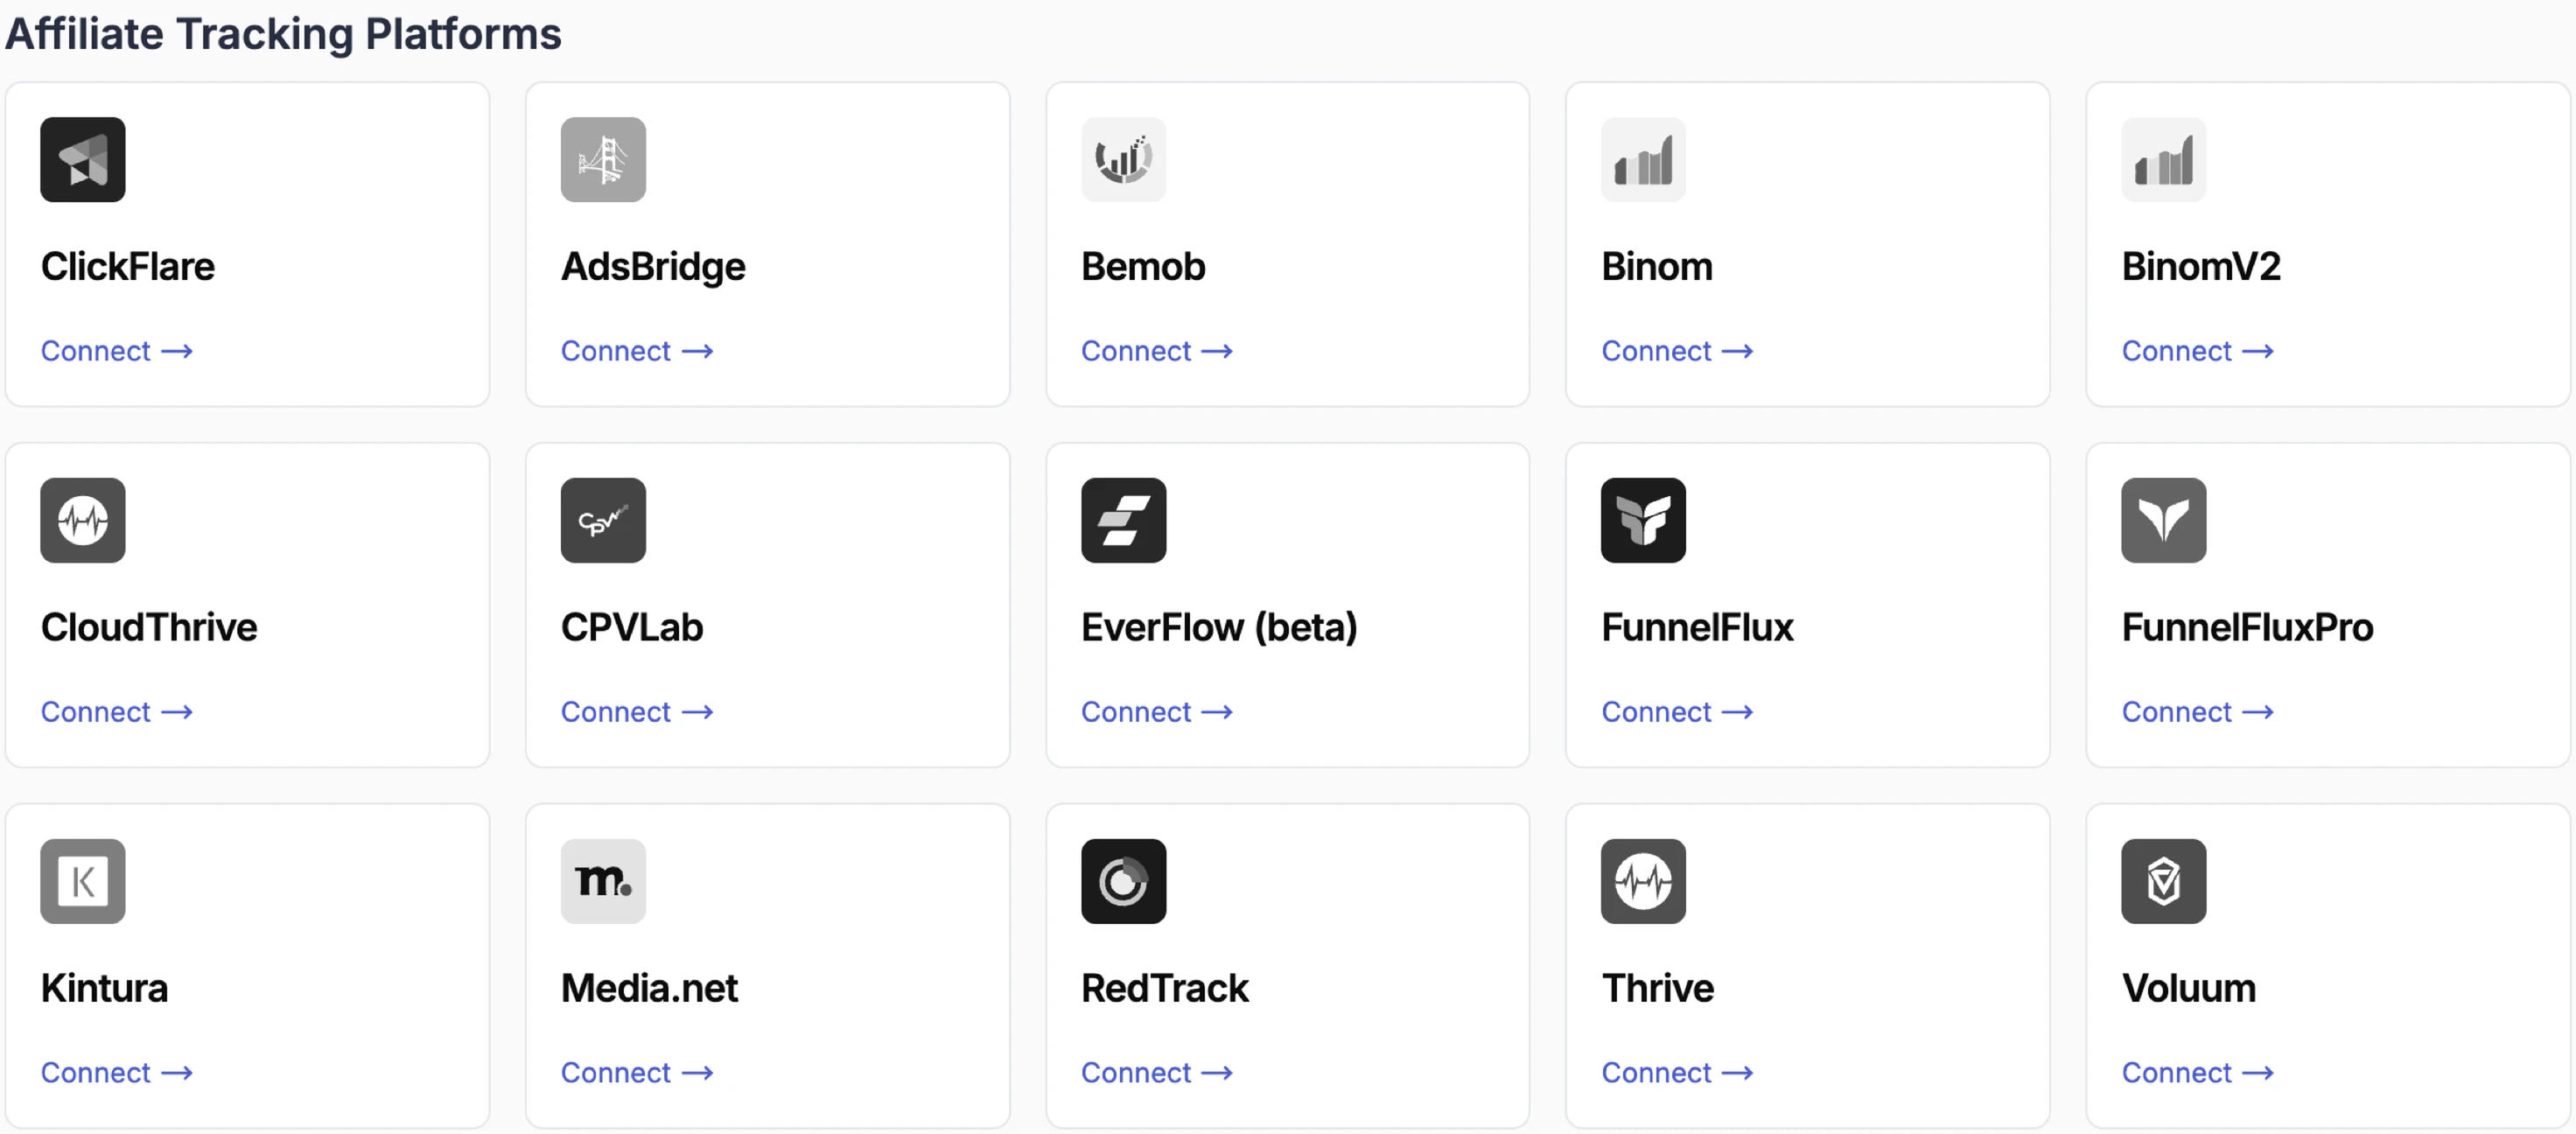
A tracking platform is not required, but it is strongly recommended. Connecting one gives you accurate cost and revenue data at the click level, browser and device breakdowns not available from ad networks alone, and a reliable revenue signal for your automation rules.
Go to **Integrations → Tracking Platforms** and connect your preferred tracker. TheOptimizer supports ClickFlare, Voluum, RedTrack, Bemob, Binom, Everflow, Google Analytics 4, and others.
If you do not already have a preferred tracker, ClickFlare is the recommended option. It offers deep integration with TheOptimizer and 24/7 support.
If your tracker is not on the supported list, you can use the **Google Sheets or Bring Your Own Data** integration as a workaround — export your conversion data to a Google Sheet and TheOptimizer will sync from it automatically every 30 minutes. Or upload a CSV file manually or push one via API.
Once your tracker is connected, check the revenue source toggle on your **Dashboard**. TheOptimizer can display revenue from the ad network or from your tracker — use the toggle to switch between them. If you see zero revenue in the **Campaigns** view, this setting is usually the cause.
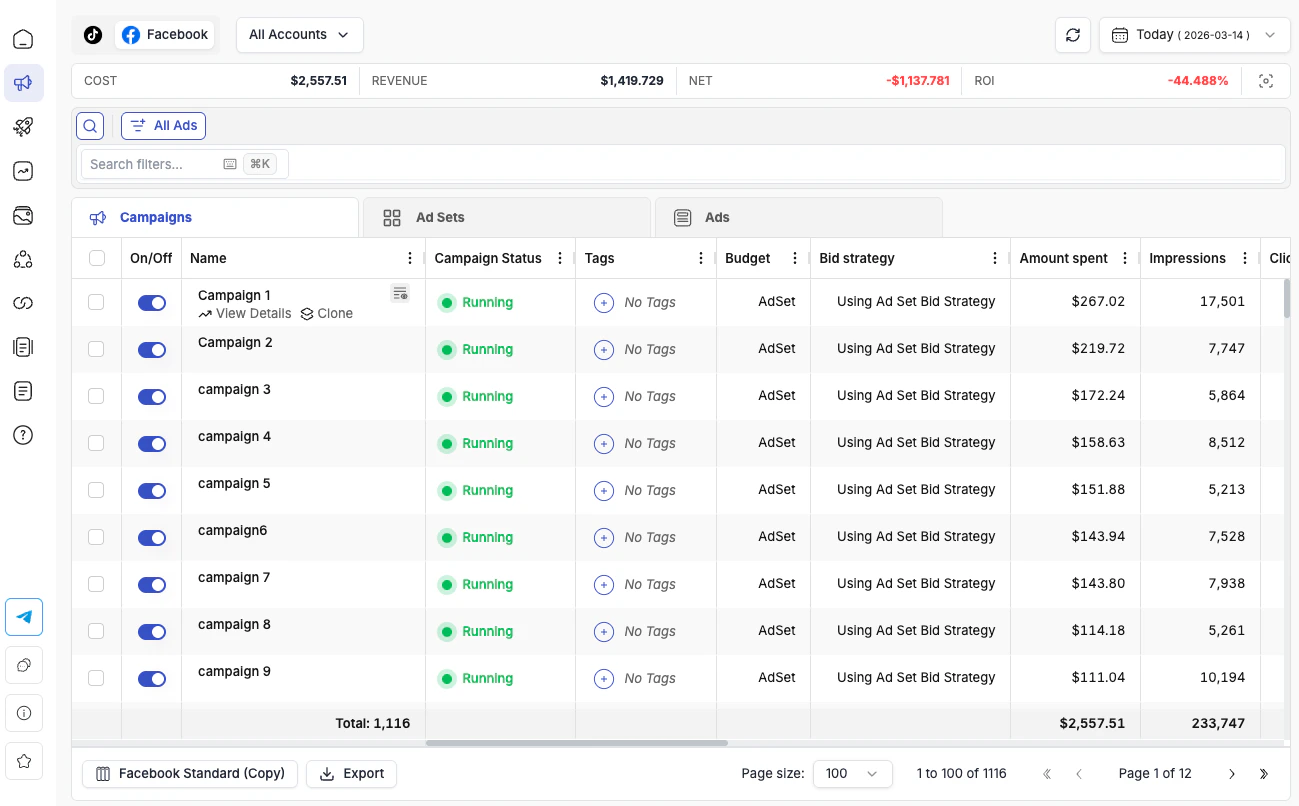
Once your ad network is connected, go to **Campaigns** in the left-hand menu. This is the central hub where you view and manage everything across all your connected accounts.
At the top, a navigation bar shows all your connected ad networks as icons. Click one to enter the campaign view for that network. Next to it, the **Ad Accounts** filter lets you narrow down to specific accounts — or see all of them at once.
Below that, a totals bar shows your total spend, revenue, net profit, and ROI for the selected date range.
The main table has three tabs — **Campaigns**, **Ad Sets**, and **Ads** — that you can switch between freely. Selecting a campaign then switching to the **Ad Sets** tab shows only that campaign's ad sets.
**Key things to try:**
* **Filtering** — click the search bar above the table to access preset quick conditions (**Delivering**, **Profitable**, **Losing Money**) or filter by any metric, name, status, or tag. Save filters you use regularly as views — they appear as tabs above the filter bar for one-click access.
* **Column customization** — click the column settings icon at the bottom-left of the table to choose which columns are visible and in what order. Save multiple column presets and switch between them. You can also create custom metrics using your own formulas.
* **Details view** — hover over any campaign, ad set, or ad name and click **View Details**. This opens a side panel with performance charts, a change history log, attached automation rules, and publisher or site-level breakdowns for native ad networks. You can move to the next or previous item without closing the panel.
* **Keyboard shortcuts** — the Campaigns section is designed to be keyboard-navigable. You can launch the filter bar, navigate the table, and edit values without using the mouse.
Automation rules convert your manual optimization strategy into logic that TheOptimizer runs around the clock. A rule watches your campaigns for specific conditions — and when those conditions are met, it takes an action such as pausing a campaign, adjusting a budget, or sending you an alert.
Go to **Automation → Rules** in the left-hand menu and click **New Rule** — or **New Global Rule** if you want the rule to apply automatically to all new campaigns in an ad account.
The fastest way to get started is to load a pre-built rule from the template library. TheOptimizer includes stop-loss rules, scaling rules, dayparting setups, and more. Load a template, review the conditions, adjust the threshold values to fit your strategy, and activate it.
Set up your automation rules before your campaigns go live. Rules that are not attached to a campaign at launch must be added manually afterward, and there may be a window where the campaign runs without any protection.
Use **Global Rules** for your safety nets such as stop-loss rules. A Global Rule automatically covers every campaign in the assigned ad account — including new ones you launch later — so you never have an unprotected campaign.
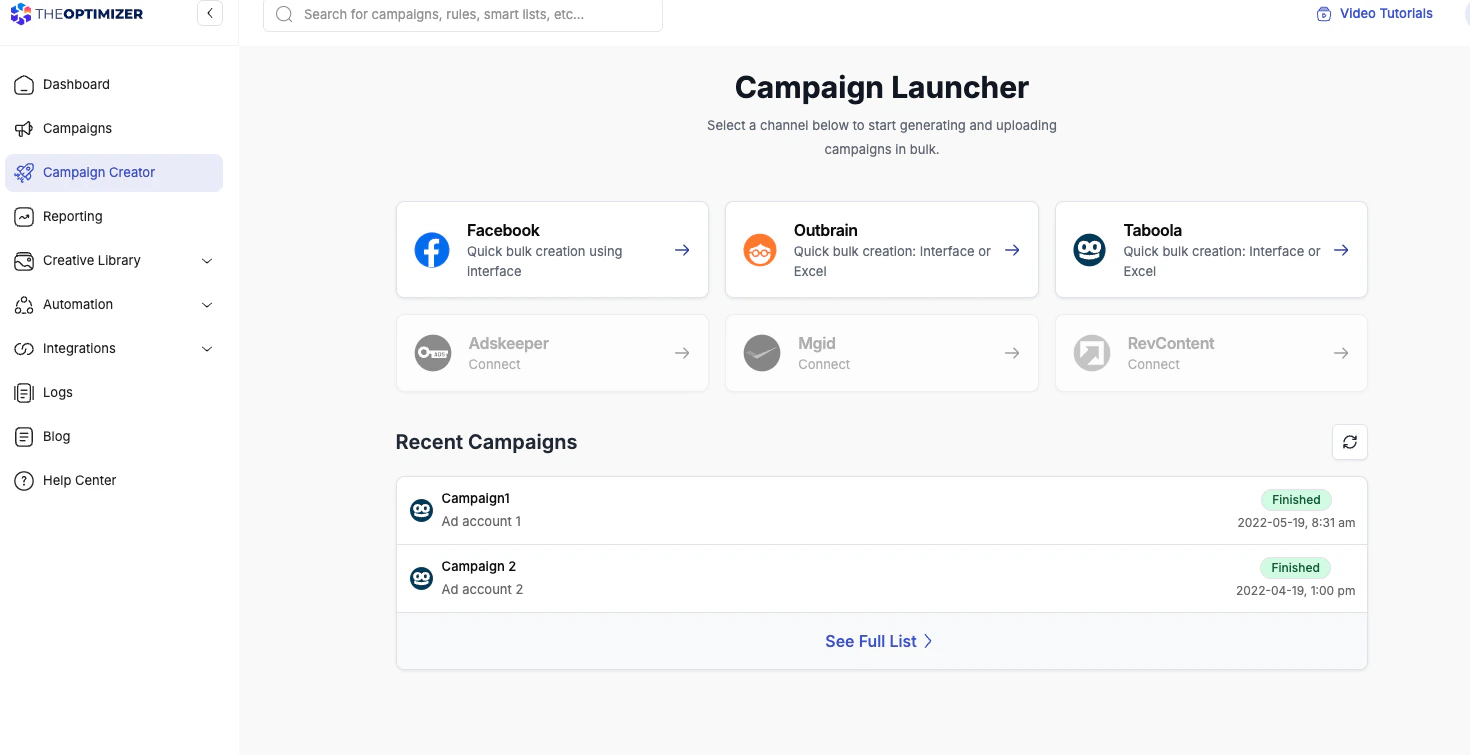
Once you are familiar with the Campaigns section and have automation rules in place, the Campaign Creator lets you build and launch campaigns at a scale that is not possible in native ad managers.
Go to **Campaign Creator** in the left-hand menu. You will see a card for each supported network — click one to open the launcher.
**Supported networks:** Facebook, Taboola, Outbrain, RevContent, MGID, AdsKeeper.
Each network supports both an interactive interface and an Excel bulk uploader — except Facebook, which uses the interactive interface only.
**What makes it worth using:**
* Upload 50–100 creatives and automatically generate one campaign (or ad set) per creative, each with isolated budgets — in a few minutes
* Test multiple audiences, budgets, or placements by defining variation groups and letting the system create all permutations
* Launch the same campaign structure across multiple ad accounts simultaneously
* Save your configuration as a reusable template for future launches
* Attach automation rules during the launch flow so they are active from the first impression
After publishing, monitor the creation process in the **Campaign Creation Queue**. You will receive email notifications when the launch completes or if any item fails — and you can use the **Retry** button on any failed item directly from the queue.
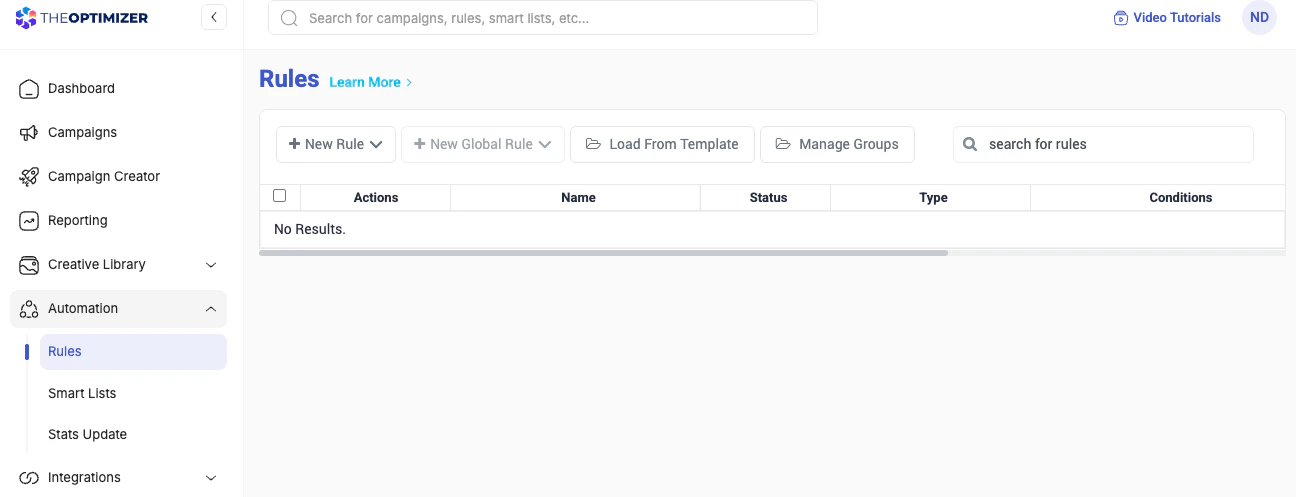 Automation rules convert your manual optimization strategy into logic that TheOptimizer runs around the clock. A rule watches your campaigns for specific conditions — and when those conditions are met, it takes an action such as pausing a campaign, adjusting a budget, or sending you an alert.
Go to **Automation → Rules** in the left-hand menu and click **New Rule** — or **New Global Rule** if you want the rule to apply automatically to all new campaigns in an ad account.
The fastest way to get started is to load a pre-built rule from the template library. TheOptimizer includes stop-loss rules, scaling rules, dayparting setups, and more. Load a template, review the conditions, adjust the threshold values to fit your strategy, and activate it.
Automation rules convert your manual optimization strategy into logic that TheOptimizer runs around the clock. A rule watches your campaigns for specific conditions — and when those conditions are met, it takes an action such as pausing a campaign, adjusting a budget, or sending you an alert.
Go to **Automation → Rules** in the left-hand menu and click **New Rule** — or **New Global Rule** if you want the rule to apply automatically to all new campaigns in an ad account.
The fastest way to get started is to load a pre-built rule from the template library. TheOptimizer includes stop-loss rules, scaling rules, dayparting setups, and more. Load a template, review the conditions, adjust the threshold values to fit your strategy, and activate it.