
The RevContent Excel Uploader lets you prepare and launch multiple campaigns at once without going through the UI one by one. You define everything — targeting, budget, bidding, and creatives — in an Excel file and submit it through TheOptimizer. You can start from a blank Google Sheets template, or download a pre-filled Excel directly from any existing campaign — ideal when you’re launching variations of setups you already run.

How It Works

1

Get Your Template

Open Campaign Creator in TheOptimizer and click the RevContent card. Choose Bulk Upload (Excel) from the options shown.
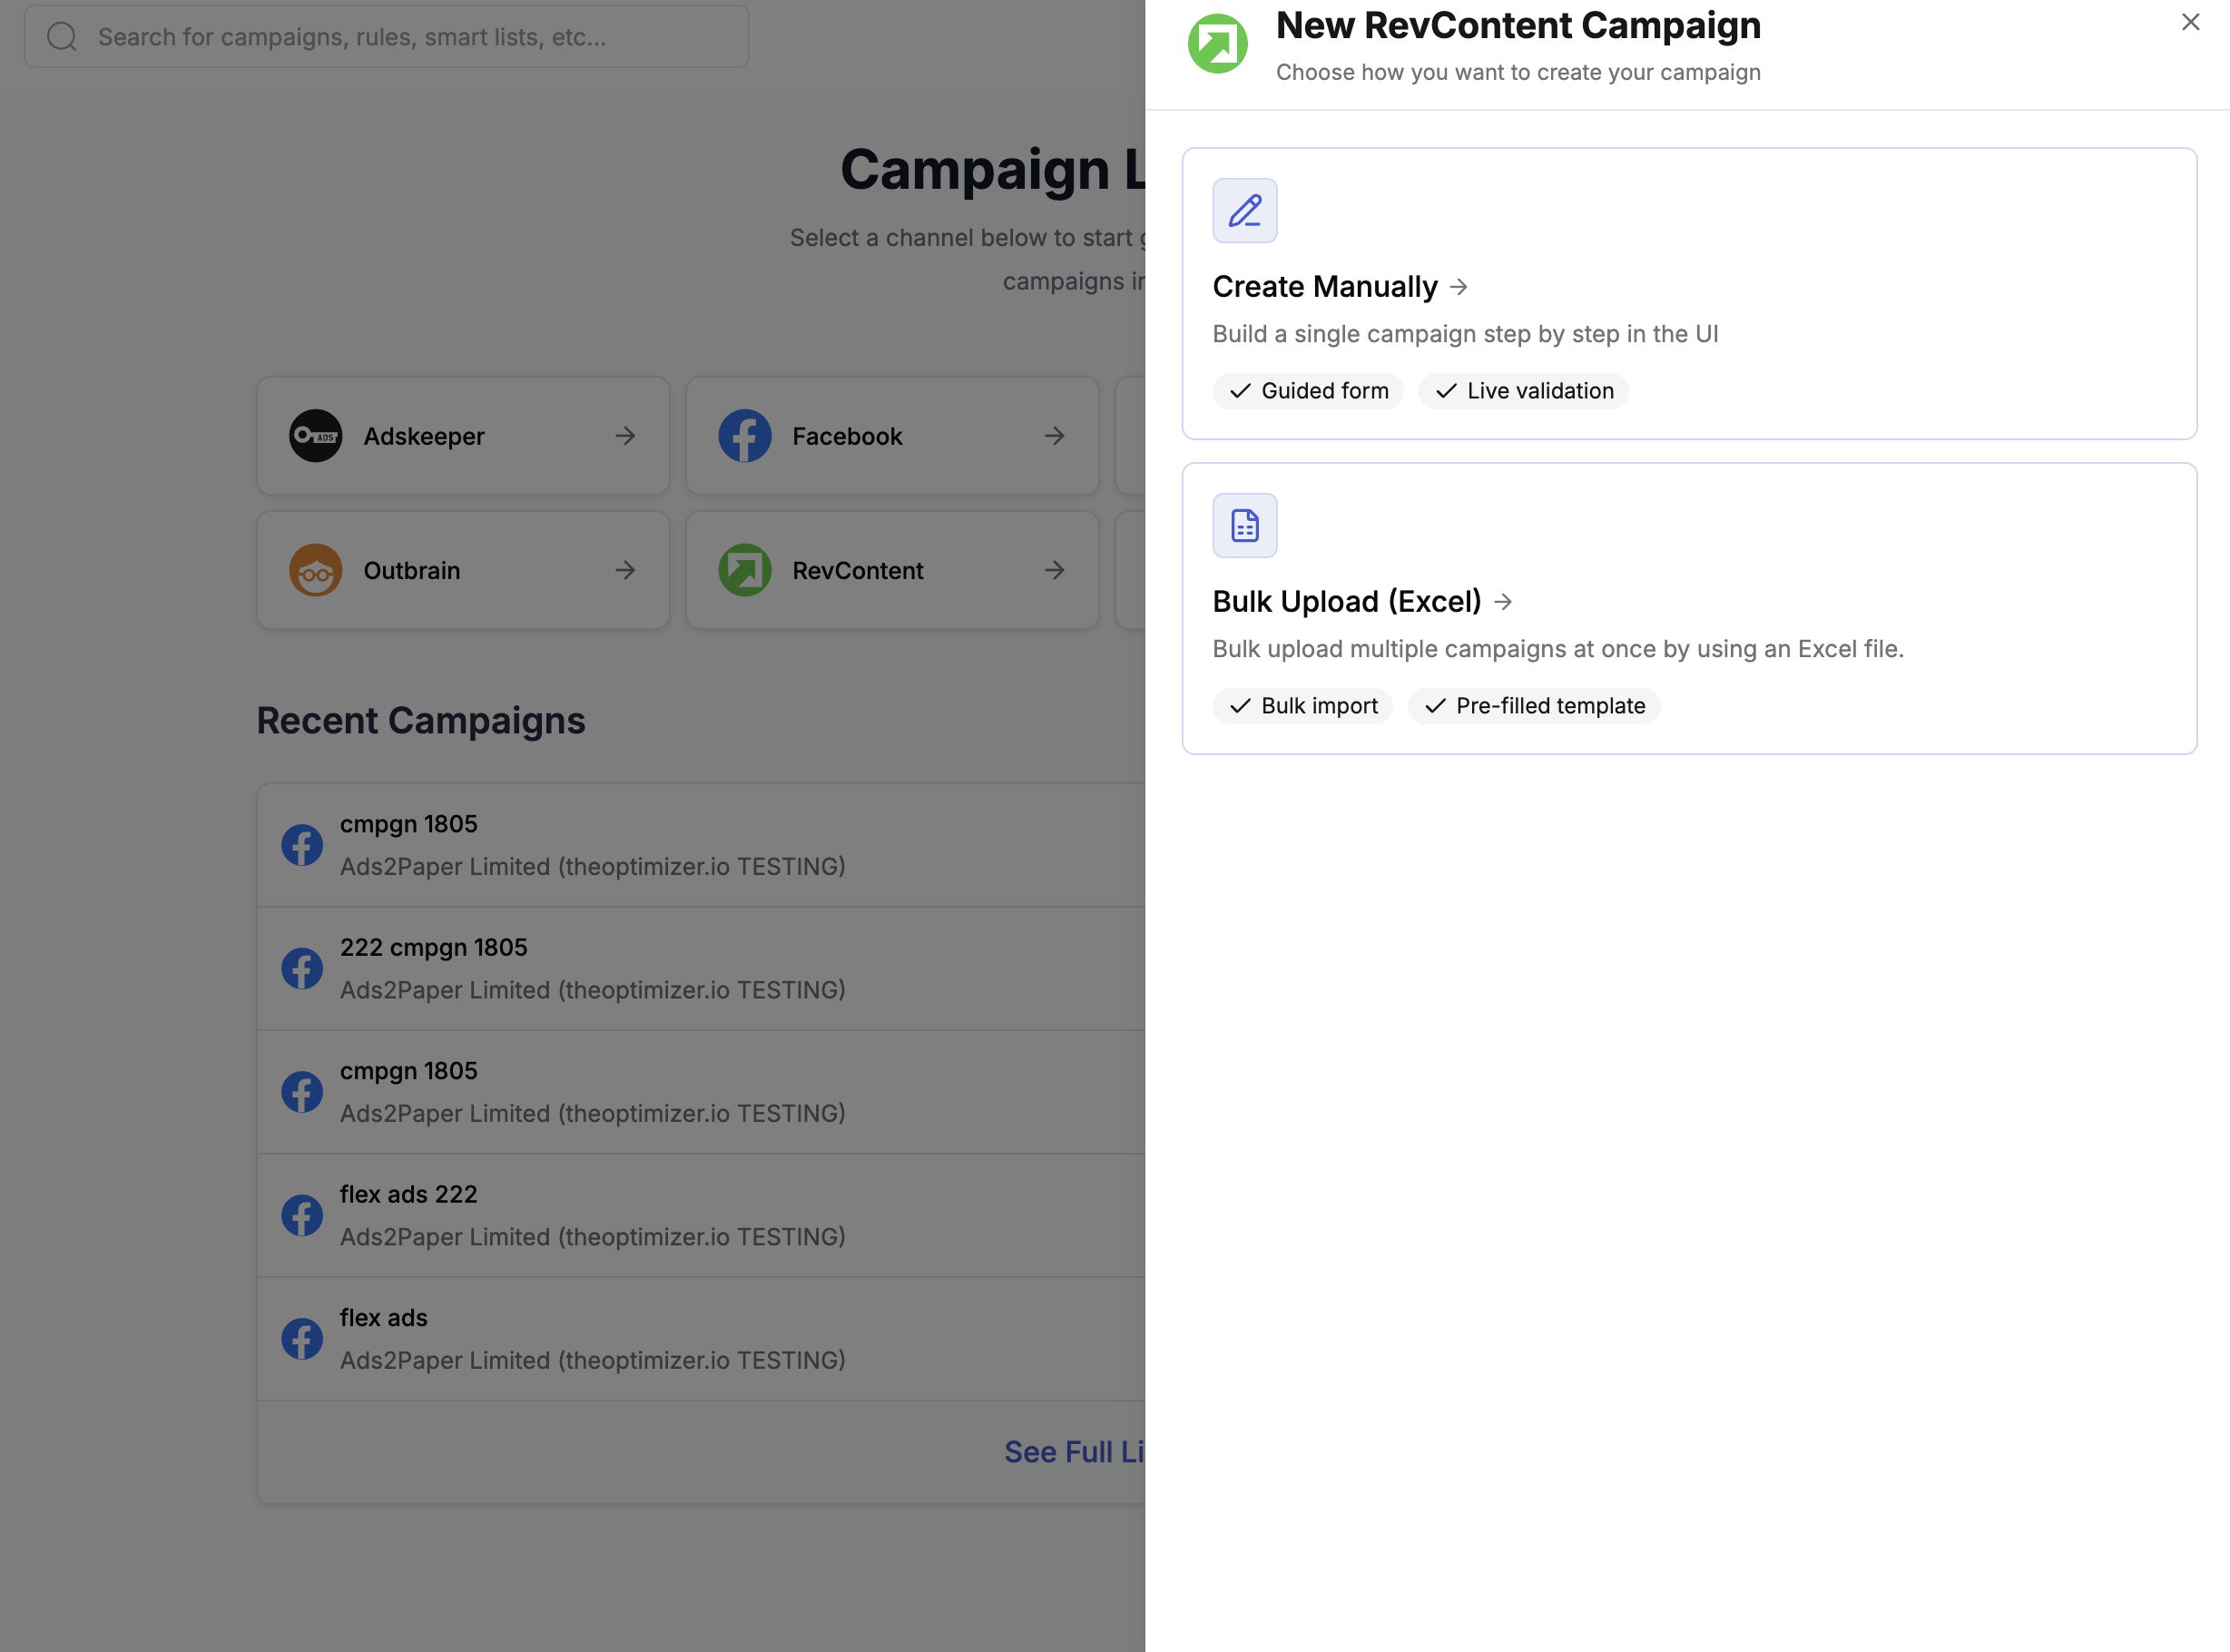
New RevContent Campaign — choose Create Manually or Bulk Upload (Excel)
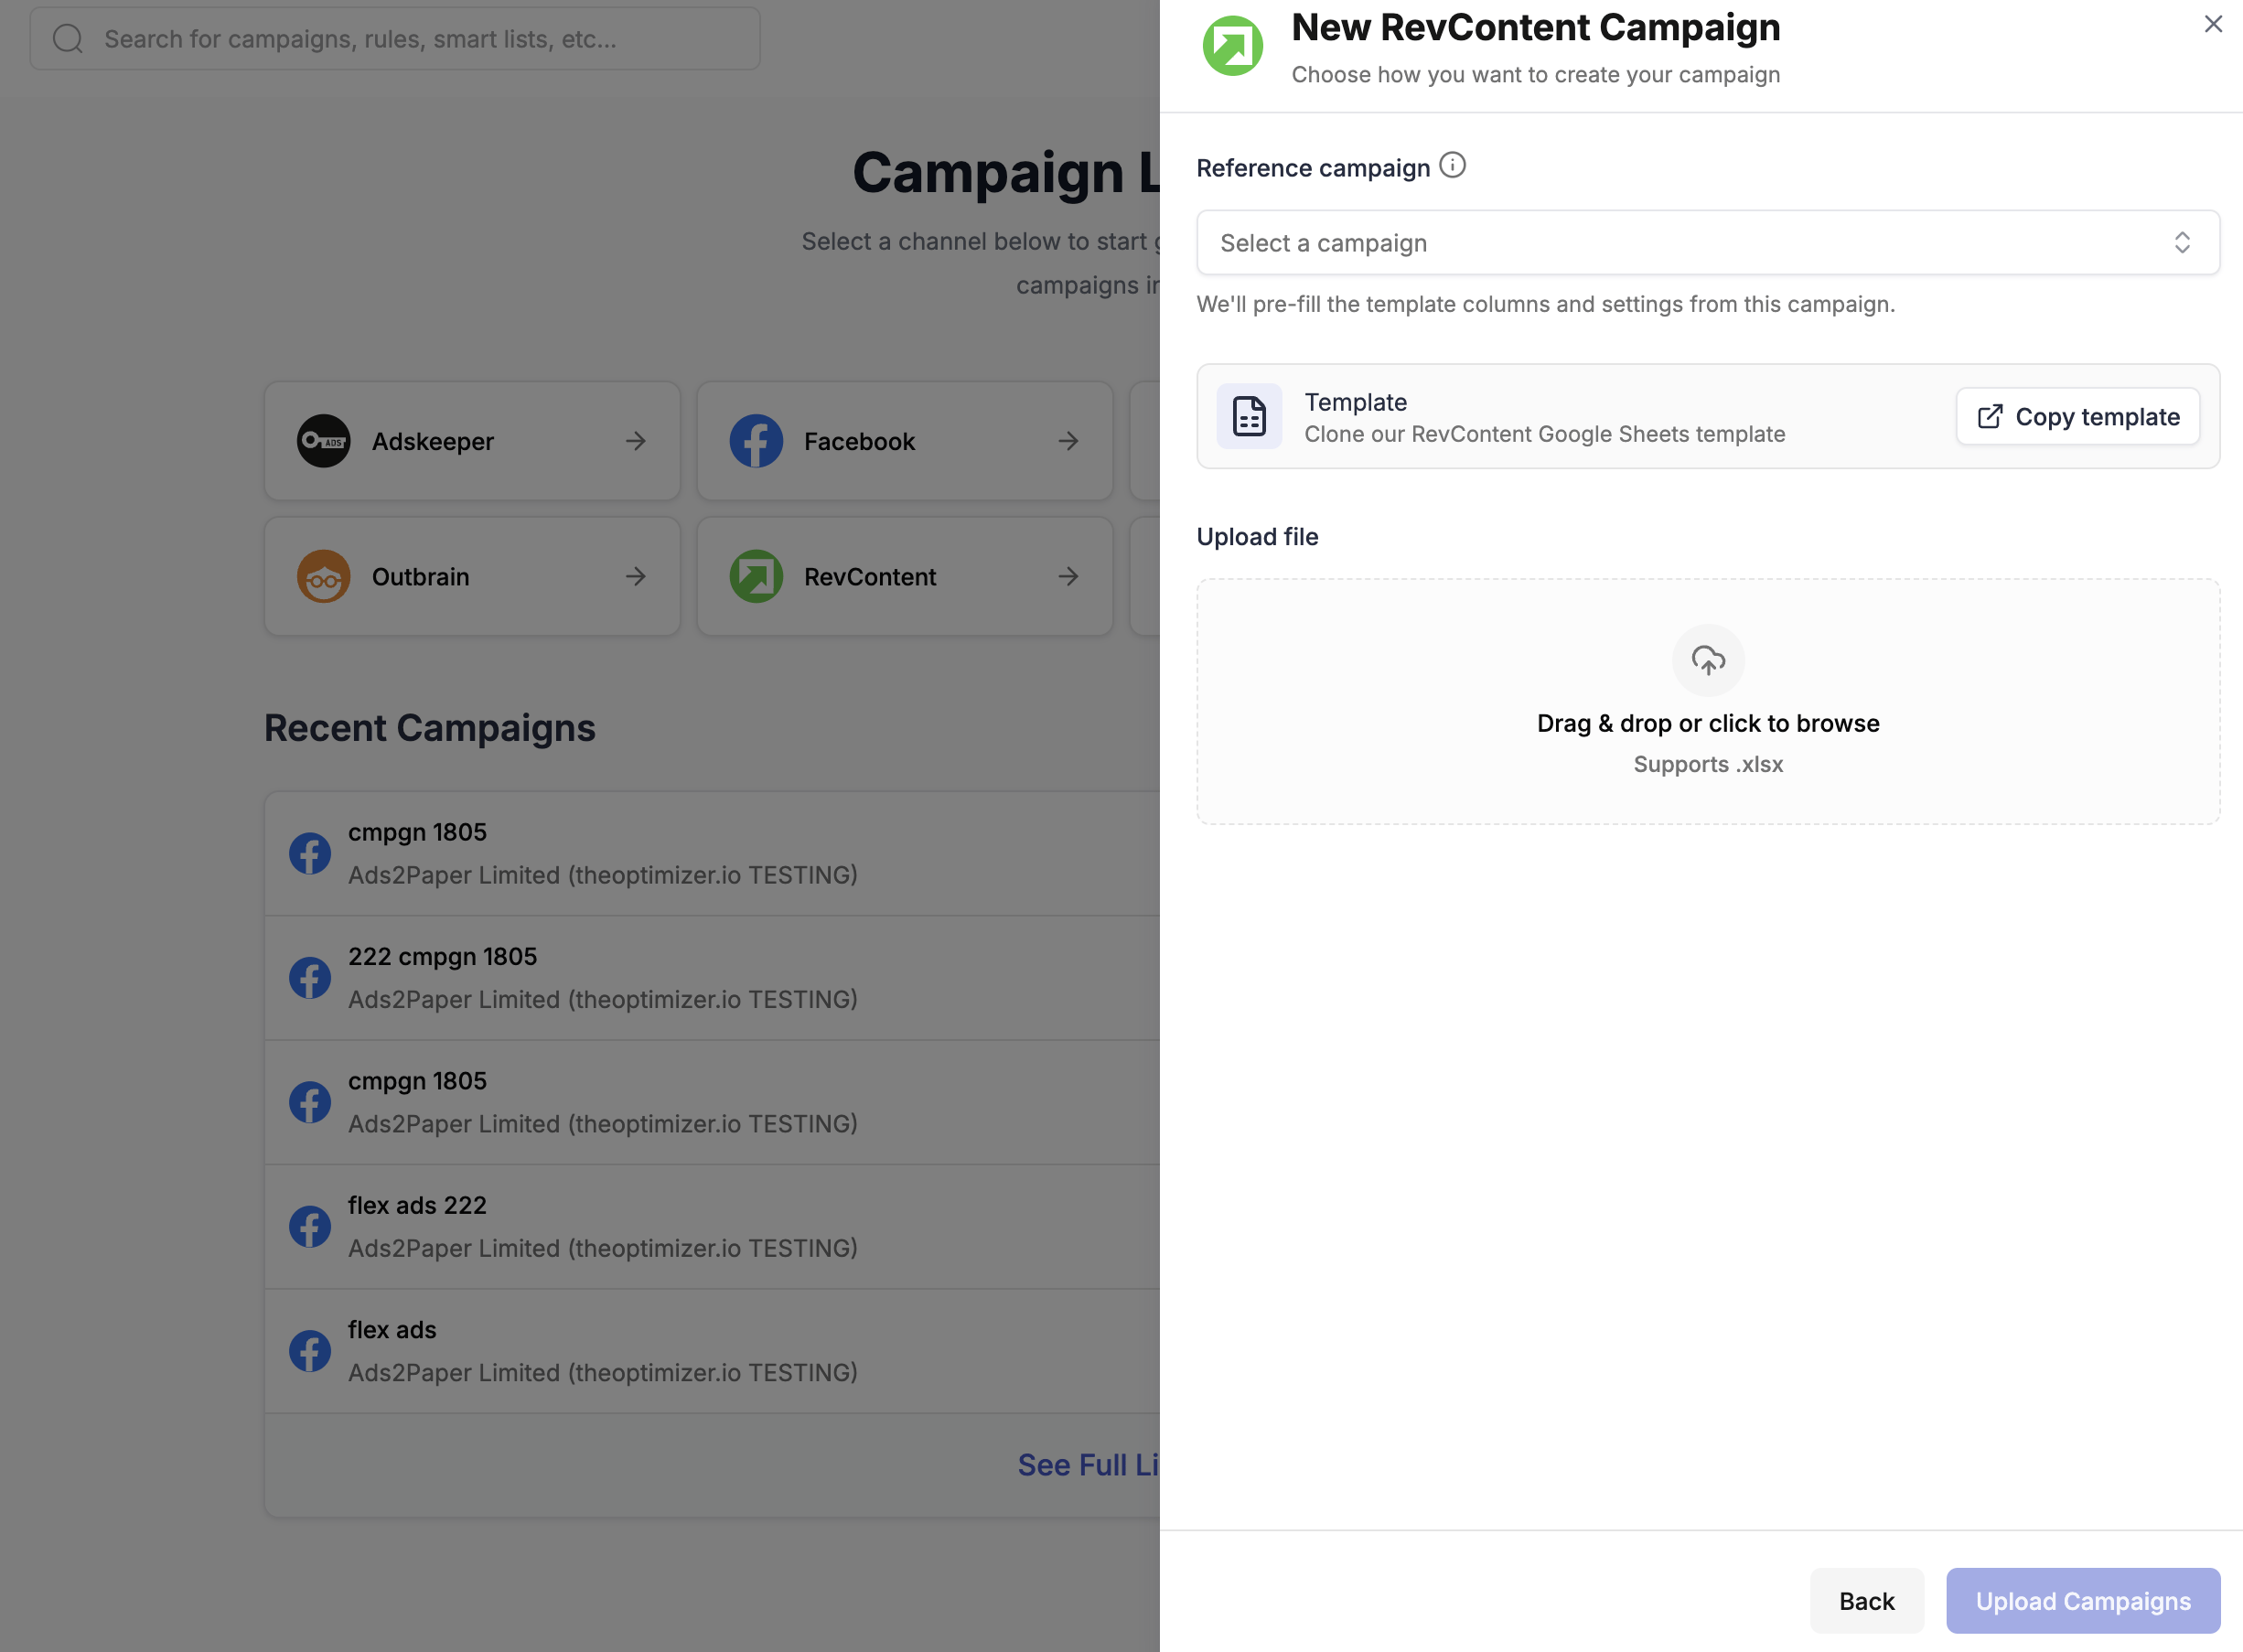
You then have two ways to get your template:Option A — Download pre-filled from an existing campaign (recommended)In the Reference campaign dropdown, select an existing campaign. TheOptimizer will pre-fill the template columns and settings from that campaign. Download the pre-filled Excel file and use it as your base — duplicate rows, update creatives and headlines, and adjust settings as needed.
RevContent Bulk Upload modal — Reference campaign dropdown, Copy template button, and file upload area
This is the fastest approach when you’re launching campaigns similar to setups you already run.Option B — Start from the empty Google Sheets templateIf you’re setting up a new campaign type from scratch, click Copy template to clone the empty template into your Google account:Clone the RevContent Google Sheets Template →The template contains:
  • A main sheet with one row per ad (campaign settings + creative in each row)
  • Auxiliary sheets with reference data: Languages, Countries, Regions, Traffic Types, and more
  • Column notes on every column header — hover over the column name to see the accepted values and format
2

Fill in Your Campaigns

Each row in the main sheet represents one ad. To create a campaign with multiple ads, add one row per ad keeping all campaign-level columns identical, and vary only the ad-level columns (image URL, headline, etc.).Key things to note:
  • Columns marked 🚩 REQUIRED must be filled in — the upload will fail if they’re missing
  • Columns marked 🟡 are conditionally required (e.g. Country Codes only needed if Country Targeting is INCLUDE or EXCLUDE)
  • Use the auxiliary sheets to look up valid values for countries, regions, languages, etc.
3

Upload Your File

If you used Option B (Google Sheets template), first export your sheet: in Google Sheets, go to File → Download → Microsoft Excel (.xlsx).Back in the modal, drag and drop your .xlsx file into the upload area or click to browse for it. Then click Upload Campaigns to submit.
4

Check Your Email for Confirmation

After submitting, TheOptimizer processes the file and sends you an email:
  • Successful upload — your campaigns are queued and being created on RevContent. Track progress from the Campaign Creator page.
  • ⚠️ Upload failed — the email will include a new Excel file with all error cells highlighted. Download it, fix the issues, and re-upload.

Column Reference

The table below describes every column in the RevContent Excel template.
ColumnDescription
Traffic Source Account ID🚩 REQUIRED. The RevContent account ID from TheOptimizer where campaigns will be uploaded. Find it under Traffic Sources in the left menu.
Campaign Name🚩 REQUIRED. The name of the campaign.
Bid Type🚩 REQUIRED. cpc — pay per click. vcpm — pay per 1,000 views.
Bid Amount🚩 REQUIRED. Amount per click (e.g. 0.15) if Bid Type is cpc, or per 1,000 views (e.g. 1.5) if vcpm.
Budget Type🚩 REQUIRED. Unlimited or Daily.
PacingSpreads budget evenly throughout the day (available for limited-budget campaigns).
Budget🚩 REQUIRED. Minimum allowed budget is $100.
Conversion TrackingComma-separated list of conversion names from your RevContent dashboard to use with this campaign.
Start date🚩 REQUIRED. immediately to start right away, or a date in yyyy-mm-dd hh:mm:ss format.
End date🚩 REQUIRED. never to run indefinitely, or a date in yyyy-mm-dd hh:mm:ss format.
Traffic Types🚩 REQUIRED. Comma-separated list. Values: Adblock, Native, PushNotifications.
Country Targeting🚩 REQUIRED. ALL, INCLUDE, or EXCLUDE.
Country Codes🟡 Required if Country Targeting is INCLUDE or EXCLUDE. Comma-separated country codes. See Countries sheet.
Region Targeting🚩 REQUIRED. ALL, INCLUDE, or EXCLUDE.
ZIP Code Targeting🚩 REQUIRED. ALL, INCLUDE, or EXCLUDE.
Region Names🟡 Required if Region Targeting is INCLUDE or EXCLUDE. Comma-separated region names. See Regions sheet.
Zip Codes🟡 Required if ZIP Code Targeting is INCLUDE or EXCLUDE. Comma-separated zip codes.
Device Targeting🚩 REQUIRED. Comma-separated list. Values: Desktop, Mobile, Tablet.
Browser Targeting🚩 REQUIRED. Comma-separated list. Values: Chrome, Firefox, Safari, Edge.
OS Targeting🚩 REQUIRED. Comma-separated list of operating systems to target.
Language Targeting🚩 REQUIRED. Comma-separated list of languages (e.g. English,French,Italian). See Languages sheet.
Tracking CodeURL parameters appended to landing page URLs for third-party tracker attribution.
Target URL🚩 REQUIRED (unless using Media Manager Ads). Landing page URL.
Image URL🚩 REQUIRED (unless using Media Manager Ads). Ad image URL.
Headline🚩 REQUIRED (unless using Media Manager Ads). Ad headline. Max 80 characters.
Brand name🚩 REQUIRED. Brand name displayed below the ad. Max 30 characters.
Media Manager AdsReference a saved Ad group from RevContent’s Media Manager instead of providing individual image/headline/URL fields.
RulesComma-separated Rule IDs from TheOptimizer to attach to the campaign after creation.
Rule GroupsComma-separated rule group names from TheOptimizer to attach after creation.