
1. Navigating the Rules Engine

Accessing Rules
1
Open Automation
On the left-side navigation menu, locate the Automation section.
2
Click Rules
Click Rules to open the rules engine.
Top Menu Options
Once inside the Rules page, the top menu bar gives you four key options:Standard Rules vs. Global Rules
The most important practical difference between the two rule types is what happens when you launch a new campaign. With a Standard Rule, you must manually open the rule and add every new campaign you create. If you forget, those new campaigns are completely unprotected — no automation applies to them. With a Global Rule, you select an Ad Account instead of individual campaigns. Any new campaign you launch inside that account is automatically covered from day one, with no extra steps required.Finding the Right Rule for Your Traffic Source
When you click New Rule, the system loads available rule types for every ad network you have connected. Use these methods to find what you need quickly: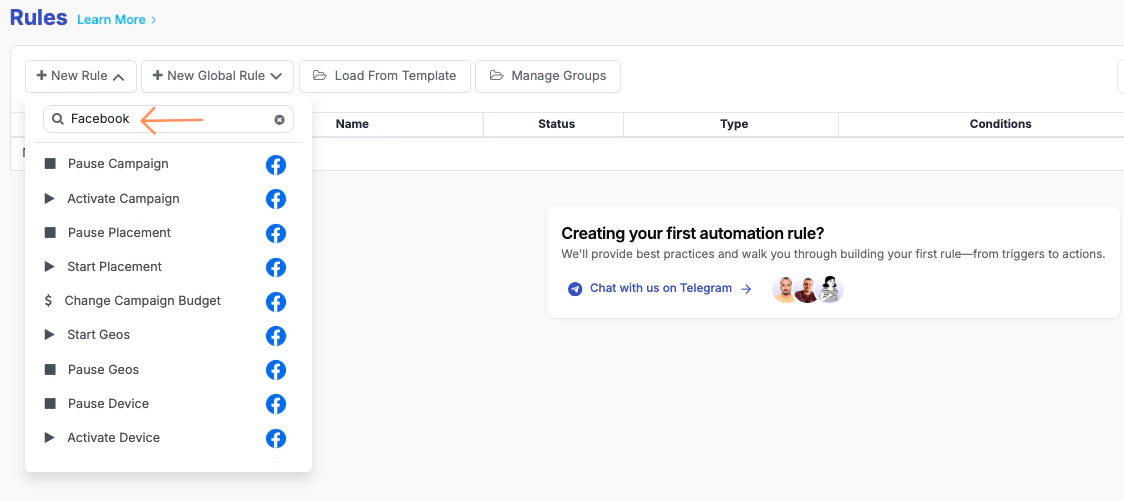
- Search by network name — type “Facebook” to filter only Facebook rules.
- Search by level — type “ad”, “campaign”, or “adset” to see rules at that level.
- Read the icons — each rule shows the logos of ad networks that support it. A rule showing all your connected network logos works across all of them.
Cross-network rules: Rules supported by multiple networks can be applied to campaigns from different ad networks within a single rule. If your Pause Campaign logic is the same for Facebook and TikTok, you can create one rule and add campaigns from both networks — rather than maintaining two separate rules.
Platform Terminology: Widget & Content
Sometimes you might encounter these terms throughout the platform (especially if you are working with native ad networks:2. Creating a Rule: Basic Settings
Click New Rule, select your rule type (for example, “Pause Ads – Facebook”), and you’ll enter the rule builder. The first section is Basic Settings.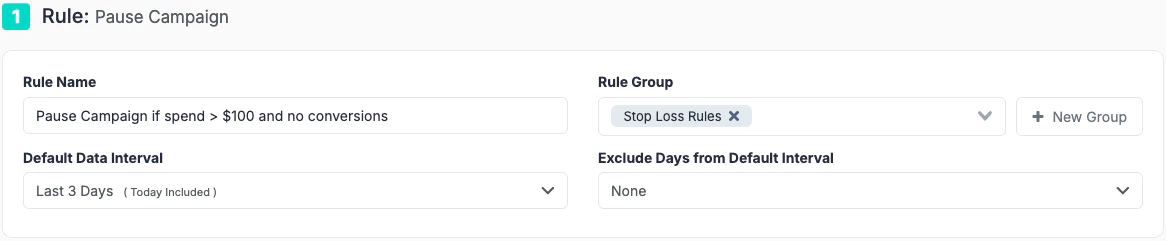
Key Configuration Steps
1
Name your rule
Use a name that describes the logic, not just the type.
Pause Ads – Spend > $50 & 0 Conv tells you everything at a glance; Rule 1 tells you nothing. As your rule library grows, self-explanatory names save a lot of scrolling.2
Assign a Rule Group (optional)
Assign the rule to a group to keep your dashboard tidy and to bulk-assign rules to campaigns later without selecting them one by one.
3
Set the Default Data Interval
The time window the system looks at when evaluating all conditions. Options range from Today and Yesterday to Last 3 Days, Last 7 Days, all the way to Last 90 Days. Every condition in the rule uses this interval unless you override it individually (see Section 3).
4
Configure Exclude Days (optional)
Removes specific recent days from the evaluation window. If your revenue data arrives with a 24-hour delay — common in Search Arbitrage — excluding Today prevents the rule from making decisions based on spend with no corresponding revenue yet. You can exclude up to the last 3 days.
3. Rule Logic: Conditions & Time Frames
The Conditions section is the brain of your automation. Conditions define the exact criteria that must all be true for the rule to execute. Each condition has three parts: a Metric, an Operator, and a Value.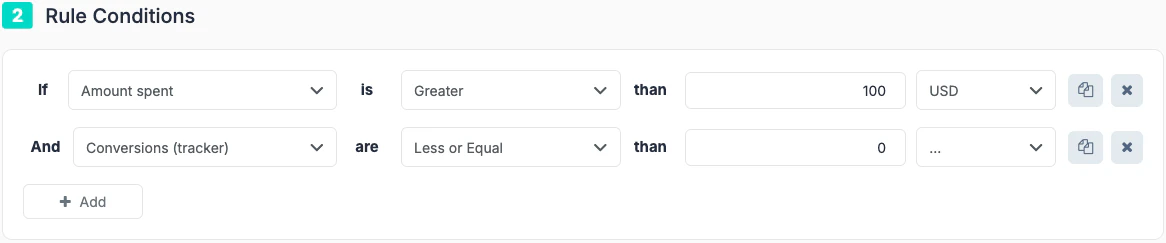
Adding Conditions
1
Click Add Condition
Click Add Condition (or the
+ button) to open a new condition row.2
Select a metric
Use the search bar in the dropdown to find metrics quickly.
3
Select an operator
Choose Greater Than, Less Than, Greater or Equal, Less or Equal, etc.
4
Enter a value
Enter the number you’re comparing against.
Understanding Metric Categories
Metrics in the dropdown are organized into three categories: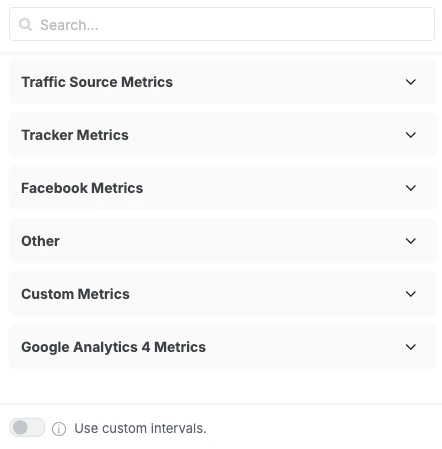
Duplicating a Condition
When you need two conditions that are very similar — for example, checking that spend is both greater than 200 — use the duplicate button on the right side of any condition row. This clones the condition so you only need to change the operator or value, rather than rebuilding from scratch.Advanced Logic: Percentage Comparisons
Instead of comparing a metric to a fixed number, you can compare it to another metric. Click the$ icon next to the value field to switch modes:

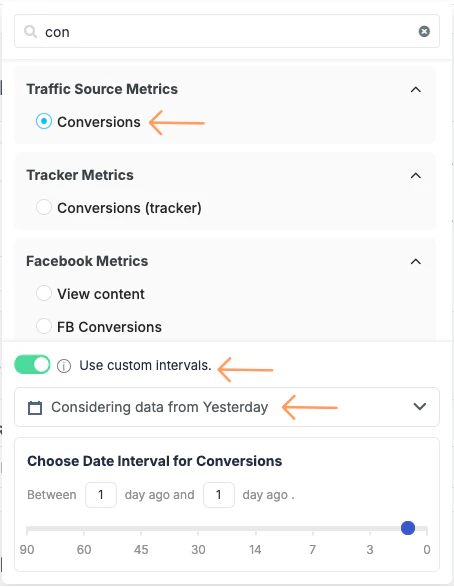
Custom Time Frames (Per Condition)
All conditions use the Default Data Interval by default, but you can override this on a per-condition basis — allowing you to build rules that look at different time windows simultaneously.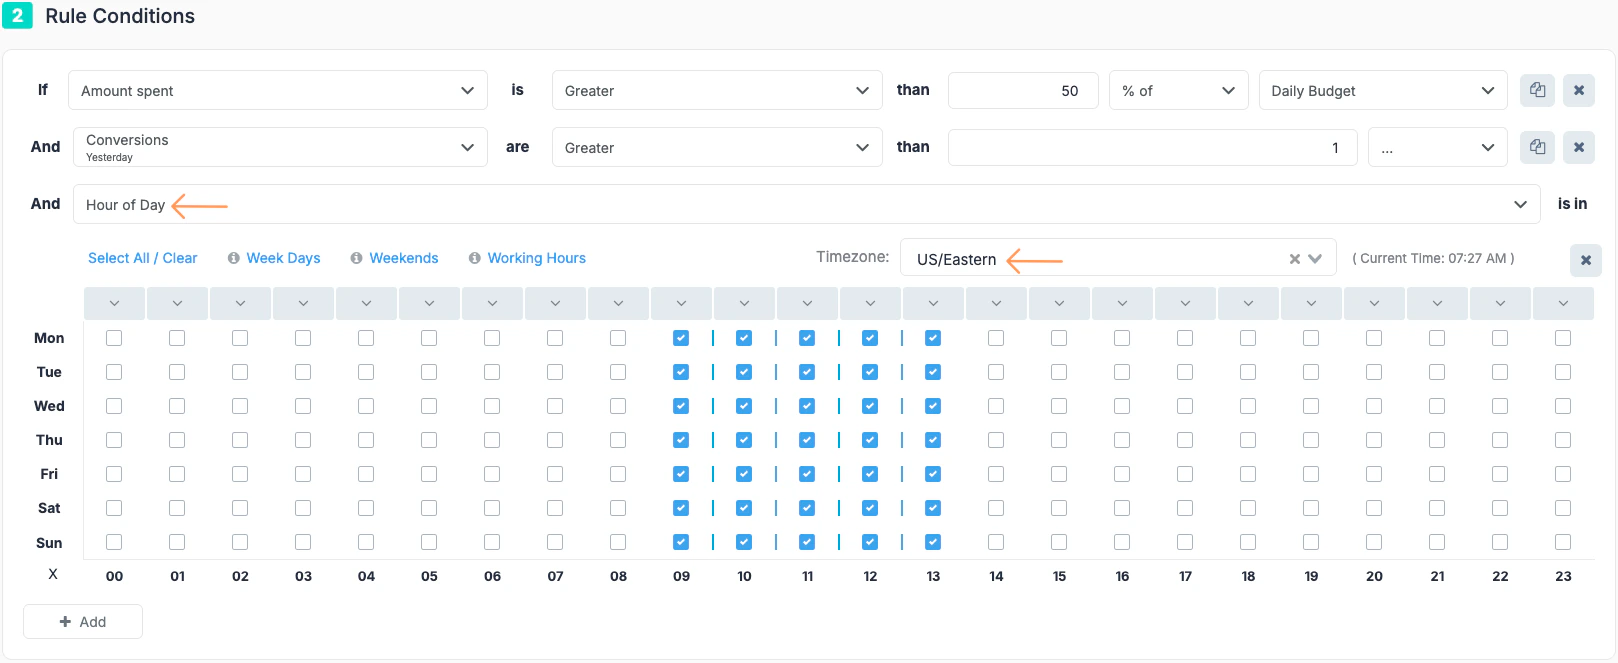
Hour of Day Condition
The Hour of Day condition restricts when a rule is allowed to act, independently of whether the other conditions are met. If you only select Monday 9am–5pm, the rule will not take any action outside those hours — even if all other conditions are true.1
Add the Hour of Day metric
Find it under the “Other” category, or search for it directly.
2
Configure the grid
A grid appears with days on the vertical axis and hours on the horizontal axis. Click individual cells, or use the shortcuts: Weekdays, Weekends, Working Hours, Select All, and Clear All. You can also click an hour header to select that hour across all days, or click a day label to select all hours for that day.
3
Set the Timezone
Defaults to UTC. Change this if your team or traffic operates in a specific timezone.
If you use an Hour of Day condition, set the rule’s execution frequency to Every 1 Hour. Running it every 10 minutes is redundant and clutters your execution logs.
Created Date Condition
The Created date condition lets a rule act on ad sets and ads based on how recently they were created. Use it to target items by age — for example, hold off on brand-new ad sets that are still in the learning phase, or run a cleanup rule only on older ad sets and ads. Add a condition and select Created date from the metric dropdown, then choose an operator and a date or age threshold.4. Rule Actions
The Rule Actions section defines what the rule does when all conditions are met. There are four main action types.1. Status Actions (Pause / Activate)
The simplest action type. When conditions are met, the entity (ad, adset, or campaign) is paused or activated. No further configuration is needed — the action is fully defined by the rule type you selected.2. Budget & Bid Adjustments
For change-budget and change-bid rule types, configure the action in the Rule Action section:
Budget Safety Rails: Floor & Ceiling
When using Increase By or Decrease By, you can set a minimum and maximum budget value to prevent the rule from adjusting beyond safe limits:- Min Budget (Floor) — The rule will never reduce the budget below this value, even if the decrease amount would go lower.
- Max Budget (Ceiling) — The rule will never increase the budget above this value, even if the increase amount would go higher.
3. Cloning Actions
Cloning rules automatically duplicate a campaign, adset, or ad when conditions are met. Two additional fields appear:
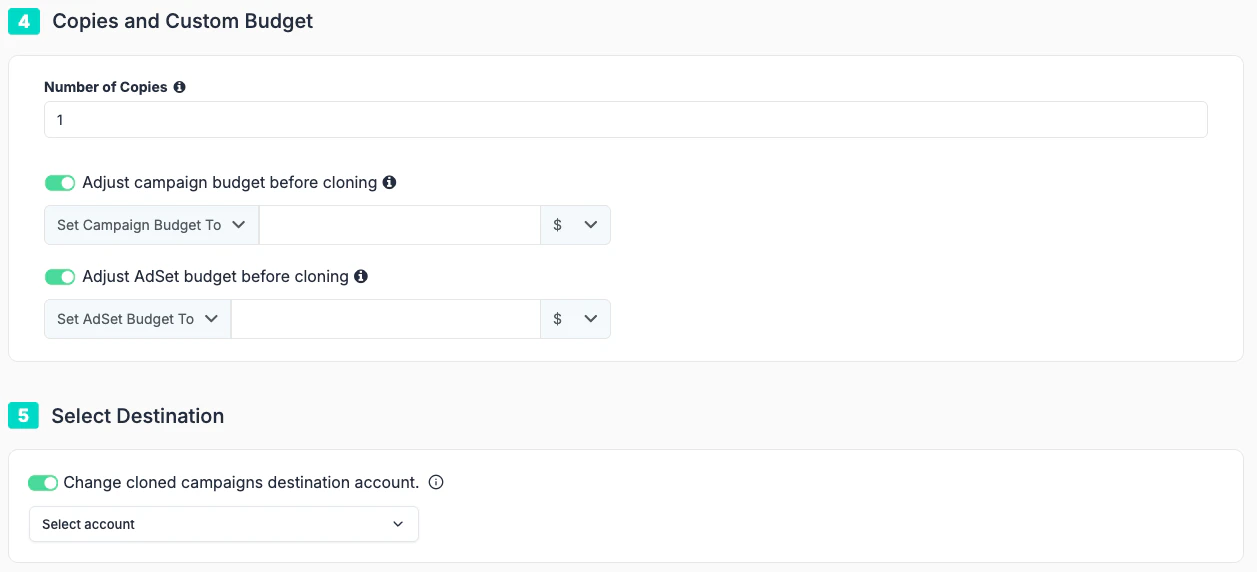
- Number of Copies — How many clones to create each time the rule fires.
- Adjust budget before cloning — Optionally set the budget on the cloned copy to a specific value at creation time, rather than inheriting the original’s current budget.
- Destination — By default, clones land in the same campaign. Enable Change Cloned Ad Destination to redirect them to a specific adset, campaign, or a different ad account. For campaign cloning rules you can now select multiple destination ad accounts in a single rule, so one rule replicates a winning campaign across your whole portfolio instead of needing a separate rule per account.
- Set start time — For campaign cloning rules, choose when the cloned campaigns should start. Instead of going live the instant they’re created, clones can be scheduled to begin at a specific time — useful for lining up automated launches with budget resets or peak-traffic hours.
4. Dayparting
Dayparting rules let you schedule exactly when a campaign runs.Dayparting is only available at the campaign level. It cannot be applied to ads or adsets.
5. Scope and Filtering
Once the logic and action are defined, you control exactly which entities the rule monitors and acts on.Filtering: Include or Exclude Specific Items
The filter section lets you narrow or exclude specific items within your selected campaigns:
You can populate either list by searching for specific items manually, or by using bulk filtering to select all items matching a naming pattern at once.
Select Campaigns
Every rule — regardless of whether it acts on ads, adsets, or campaigns — requires you to specify which campaigns it monitors. The rule evaluates entities within those campaigns only.- Manual Selection — Search for specific campaigns and check them one by one.
- Smart Filtering — Use the filter sidebar to auto-select all campaigns matching a naming pattern (e.g., all campaigns containing “US_2026”).
If you are creating a Global Rule, this section asks you to select Ad Accounts instead of individual campaigns.
6. Scheduling & Frequency
This setting controls how often TheOptimizer evaluates your conditions and potentially fires the rule.If your rule includes an Hour of Day condition, set the frequency to Every 1 Hour. Running it every 10 minutes is redundant — the rule won’t act outside the specified hours regardless — and it clutters your execution logs.