
The Three Panels
Left panel — Campaign tree. A tree structure showing your campaign hierarchy: Campaign → Ad Set → Ad. Click any level to navigate to its settings. Use the three-dot menu (⋯) on any item to duplicate, create new, or rename. Centre panel — Settings. This is where you configure everything for the currently selected level. The options mirror what you see in Facebook Ads Manager — campaign objective, budget, audience targeting, placements, creatives, and so on. Right panel — My Space & Variation Preview. Two tabs:- My Space — contextual helpers that change based on which level you are on. At the campaign level you see saved templates. At the ad set level you see recently used targeting configurations you can apply with one click. At the ad level you see your most recently active ads that you can reuse.
- Variation Preview — a live counter showing how many campaigns, ad sets, and ads will be created based on your current configuration, including any groups and restructuring settings you have applied.
The Three-Step Launch Flow
At the bottom of the screen, a progress bar shows the three main steps: 1. Create Campaign — configure the campaign, ad set, and ad settings. Upload your creatives and define any groups (multiple audiences, budgets, placements, etc.). At the very beginning of this step, you also define your campaign structure and ad set structure — deciding upfront how variations will be distributed across campaigns and ad sets. 2. Review Variations — a full-screen summary of everything that will be created. A header row of information cards shows totals (campaigns, ad sets, budgets, ads, headlines, descriptions). Below is the complete campaign tree — Campaign → Ad Set → Ad — with toggle switches to enable or disable individual variations and naming templates visible throughout. No restructuring is done here; that has been moved to Step 1. 3. Add Automation & Publish — attach automation rules to your campaigns before they go live, review the full campaign list, and click Publish.Starting From a Template
If you have previously saved a campaign template, you do not need to configure everything from scratch. At the campaign level, open the My Space tab on the right panel and click Apply Template next to the template you want to load. The entire structure — campaign settings, ad sets, ads, groups, restructuring settings, and automation assignments — loads instantly. From there, you typically only need to swap in new creatives, adjust a budget, or update the ad account. See Save Your Work as a Template & Reuse for details on creating and managing templates.The walkthrough below covers a straightforward campaign with one ad set and multiple ads — no groups, no restructuring. This is the foundation. All advanced features build on top of this base.
Campaign Level
Click on the campaign in the left panel tree and configure the following:Campaign Budget
The Budget section at the campaign level has two modes: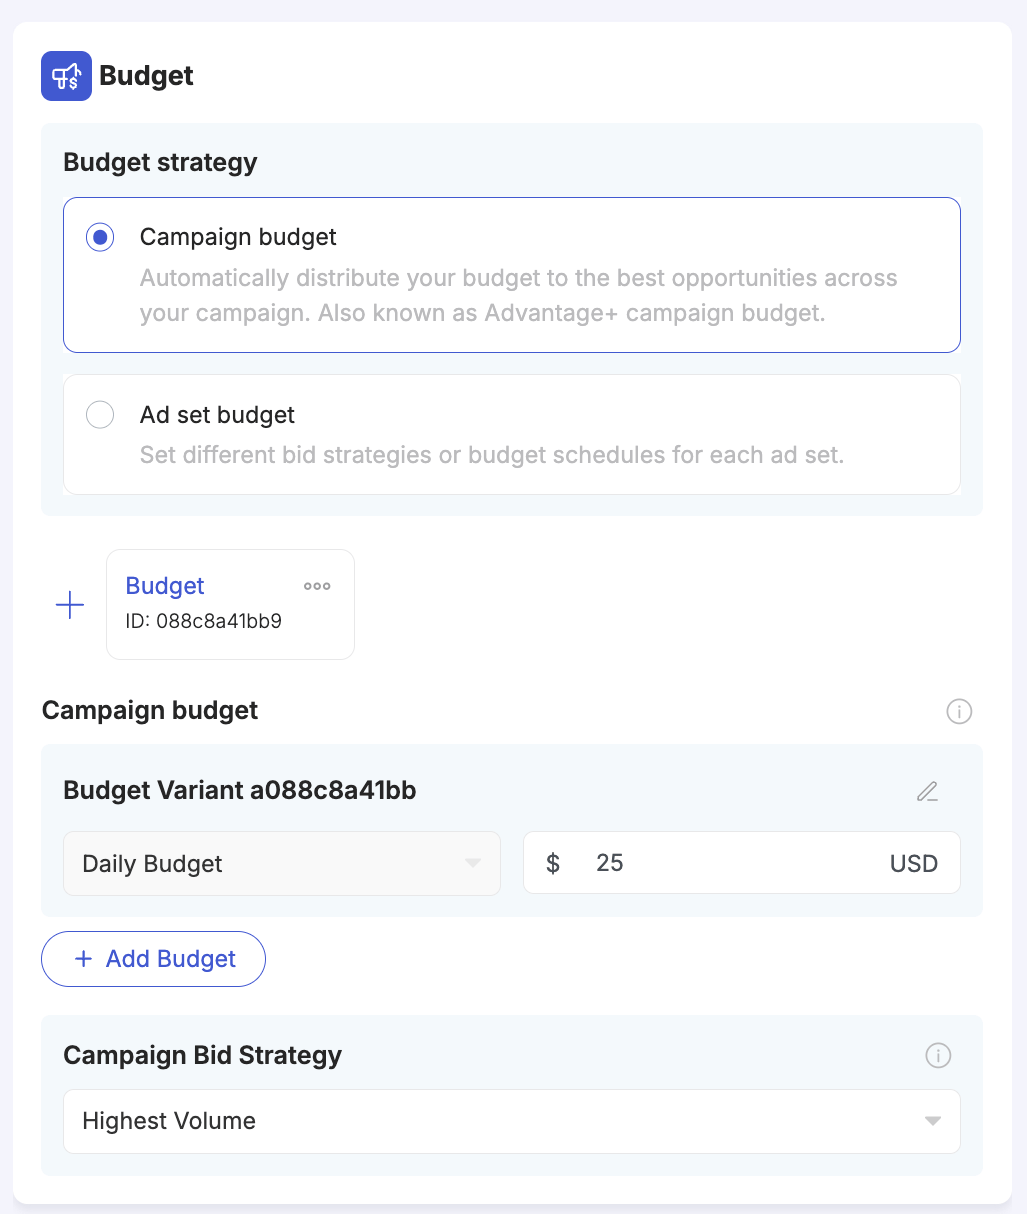
- Campaign budget (Advantage+ Campaign Budget) — Facebook automatically distributes the total budget across your ad sets, allocating more to the best-performing ones. This is the recommended option for most use cases.
- Ad set budget — each ad set gets its own independent budget, which you configure individually at the ad set level. Use this when you need strict budget control per ad set.
Ad Set Level
Click on the Ad Set in the left panel tree and configure the following:Budget & Schedule
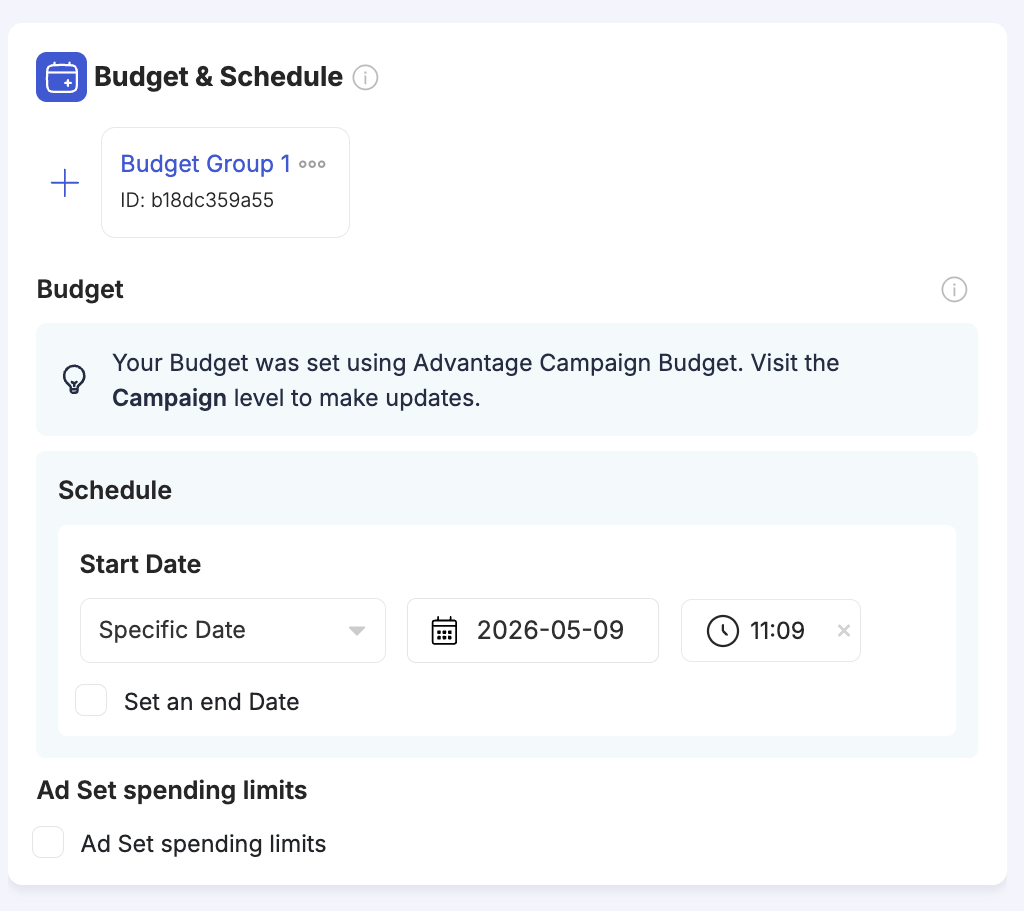
Ad Set spending limits — tick this checkbox to set a maximum and/or minimum amount Facebook can spend on this ad set over its lifetime, regardless of the campaign budget. Useful when using Advantage Campaign Budget and you want to protect or guarantee spend for specific ad sets.
Audience Controls
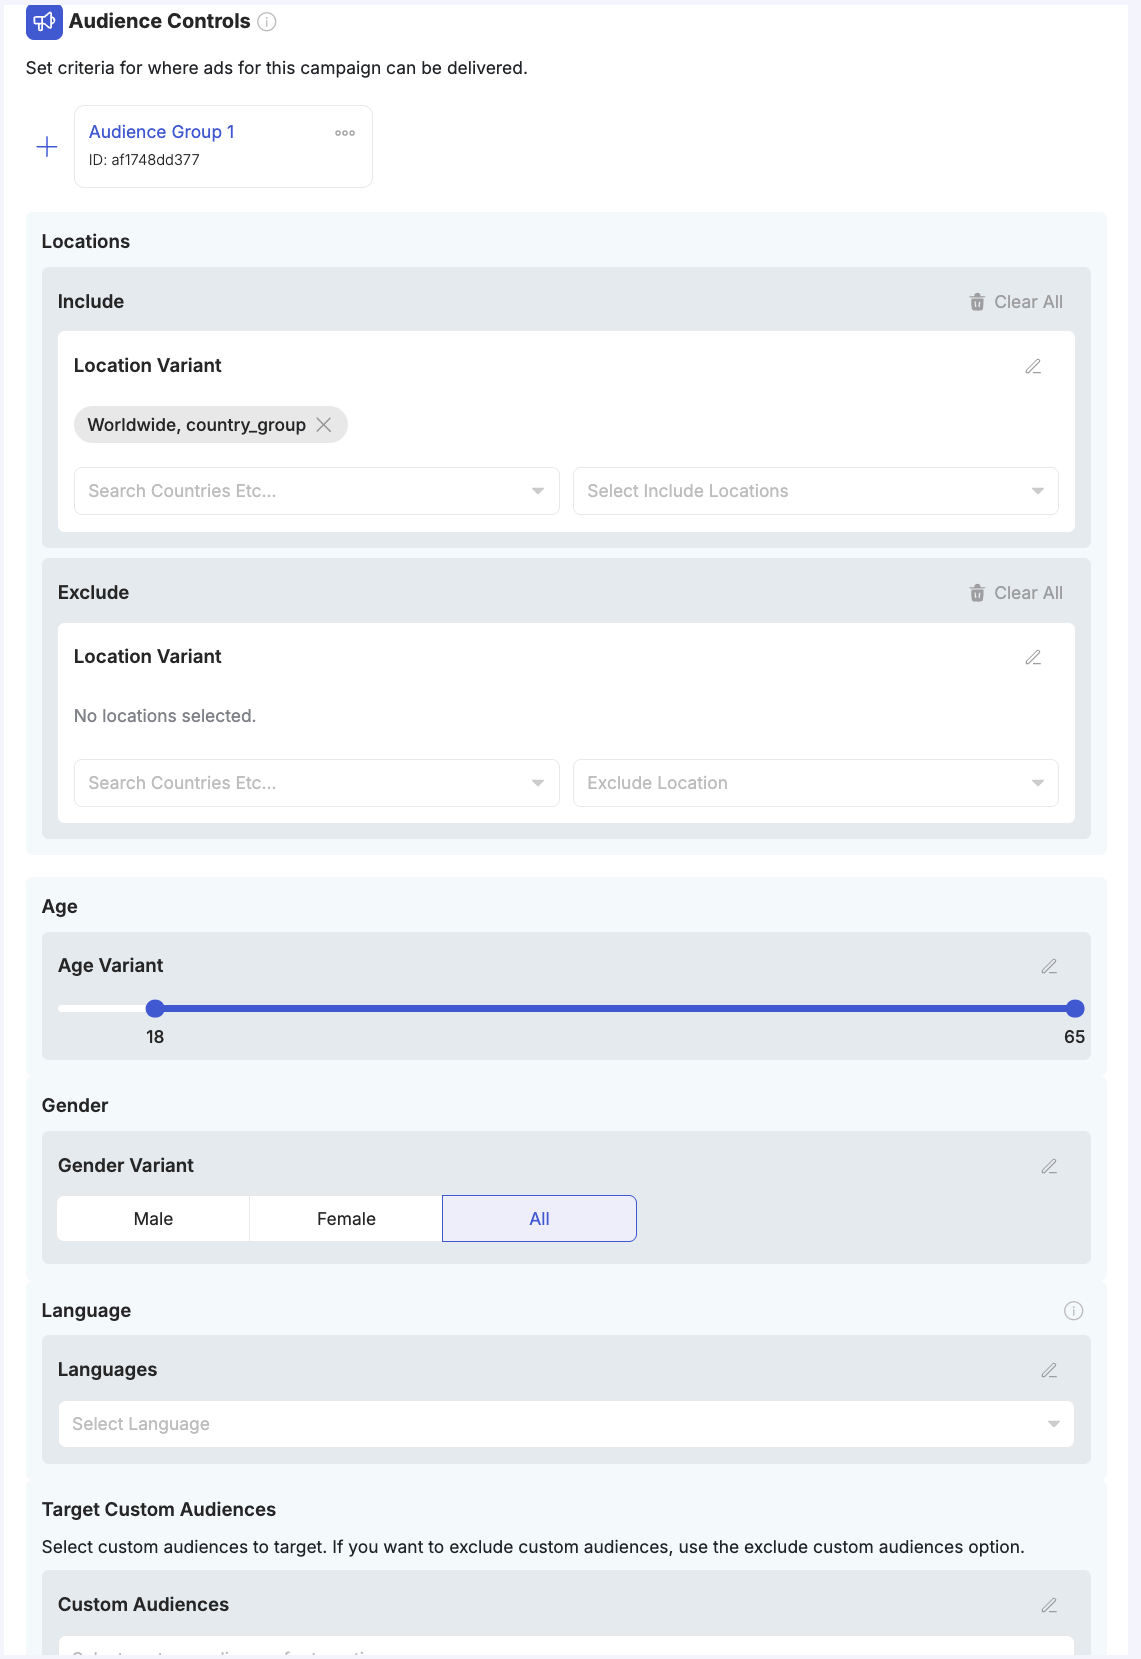
- Include — add countries, regions, cities, or postal codes. Use the Location Variant field to apply a location preset (e.g., “Worldwide, country_group” to target all countries at once) or search and select specific locations.
- Exclude — remove specific locations from your targeting. Useful for blocking countries where you are not set up to take orders, or removing existing customer locations from a prospecting campaign.
TheOptimizer does not currently support creating Custom Audiences. If you work with custom or lookalike audiences, create them in Facebook Ads Manager first — they will then appear in the audience selector here.
Placements
Ad Level
Click on the ad in the left panel tree and configure the following:Identity
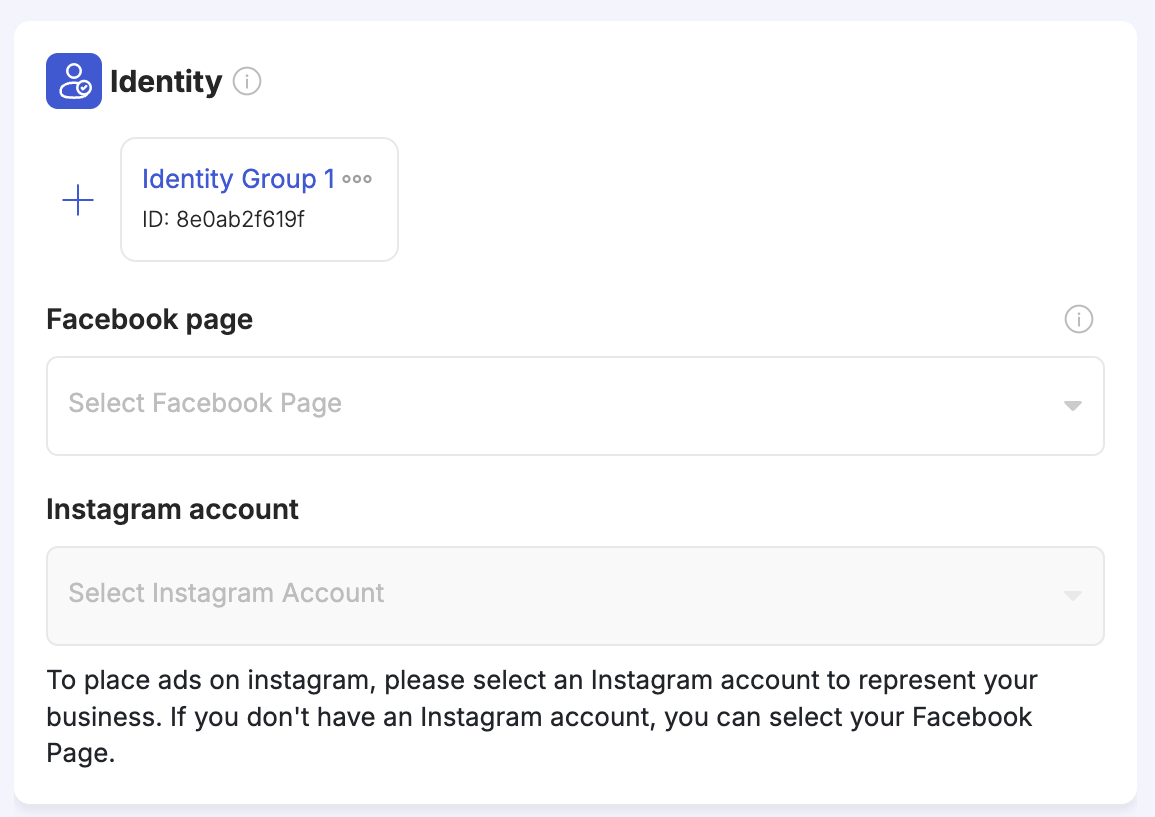
Each identity group card represents a separate Identity variation — add more groups with + to test running the same ads from different Pages or Instagram accounts. This is useful for agencies managing multiple brands, or for testing how audience perception varies by Page identity.
Ad Creative
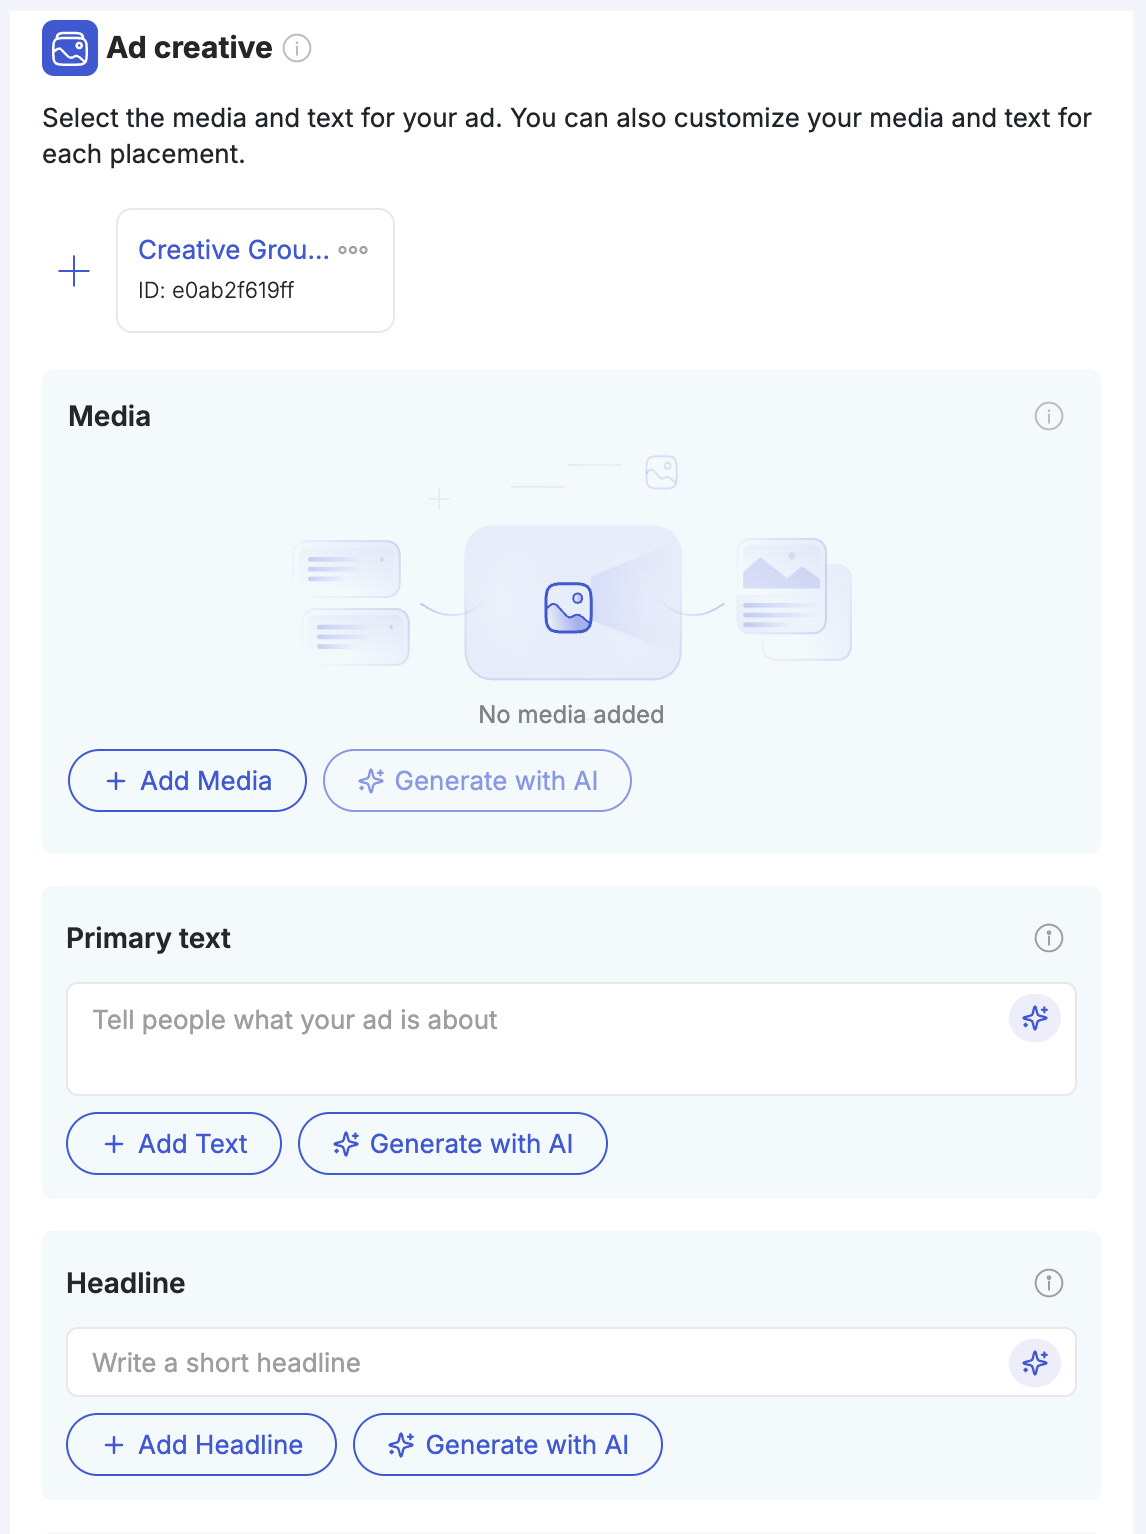
Media — click + Add Media to open the media browser where you can:
- Browse existing creatives — TheOptimizer displays all images and videos from your active campaigns across all connected Facebook accounts. Sort by newest, oldest, highest spend, highest EPC, most used, or least used. Filter by Creative Library tags.
- Upload new media — click Upload to add new images or videos directly.
- Generate with AI — click ✨ Generate with AI to create new image variations using an AI prompt or example images. Useful for quickly producing creative variants without leaving the launcher.
- Enhance with AI — generate a new version of any image by providing a prompt or example images.
- Customize by Placement — assign a different image for specific placements (for example, a different crop for Instagram Stories). You can do this per image, or use Bulk Placement Customization at the bottom of the media section to apply placement overrides across all ads at once.
Destination:
Apply to All Groups
When you are working with multiple Creative groups, you can push the content of any media, primary text, headline, or description field to every other group in one click. Click the three-dot menu (⋯) on any media item, text field, headline, or description and select Apply to All Groups. This copies that value into the same field across all other Creative groups — useful when you want all groups to start from the same base creative or copy and then make minor tweaks per group.Auto-Match Images by Filename to Placements
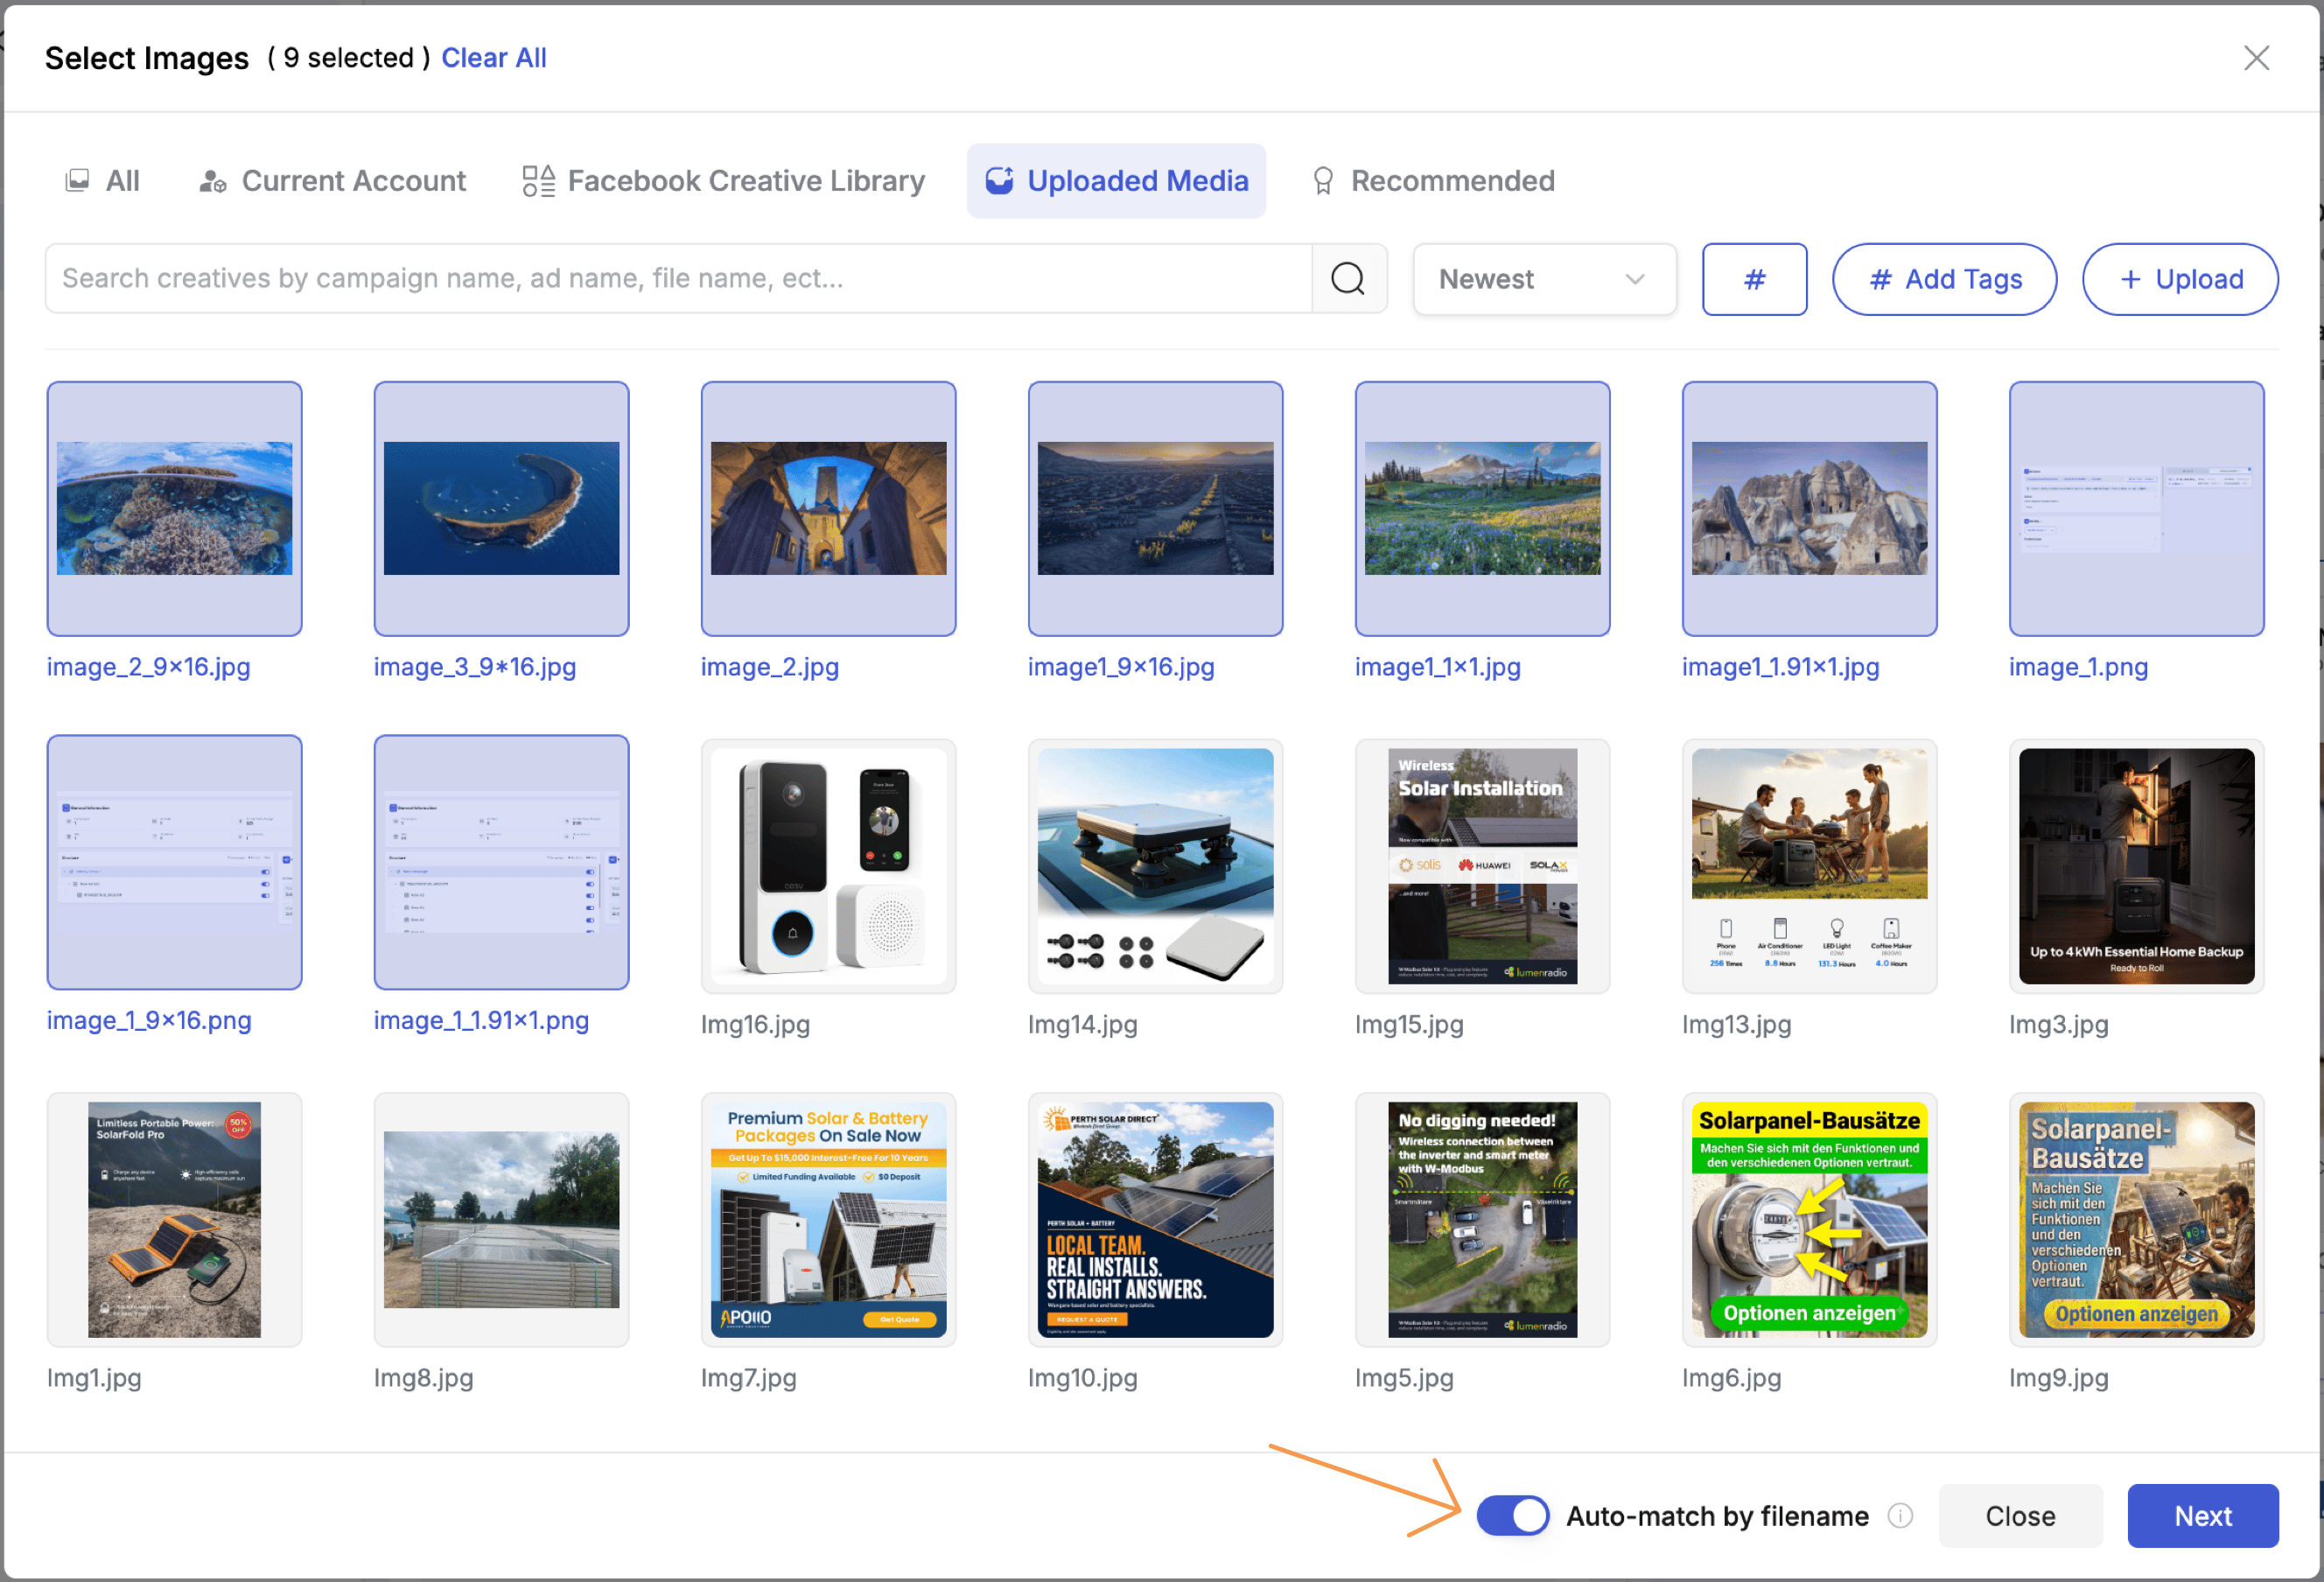
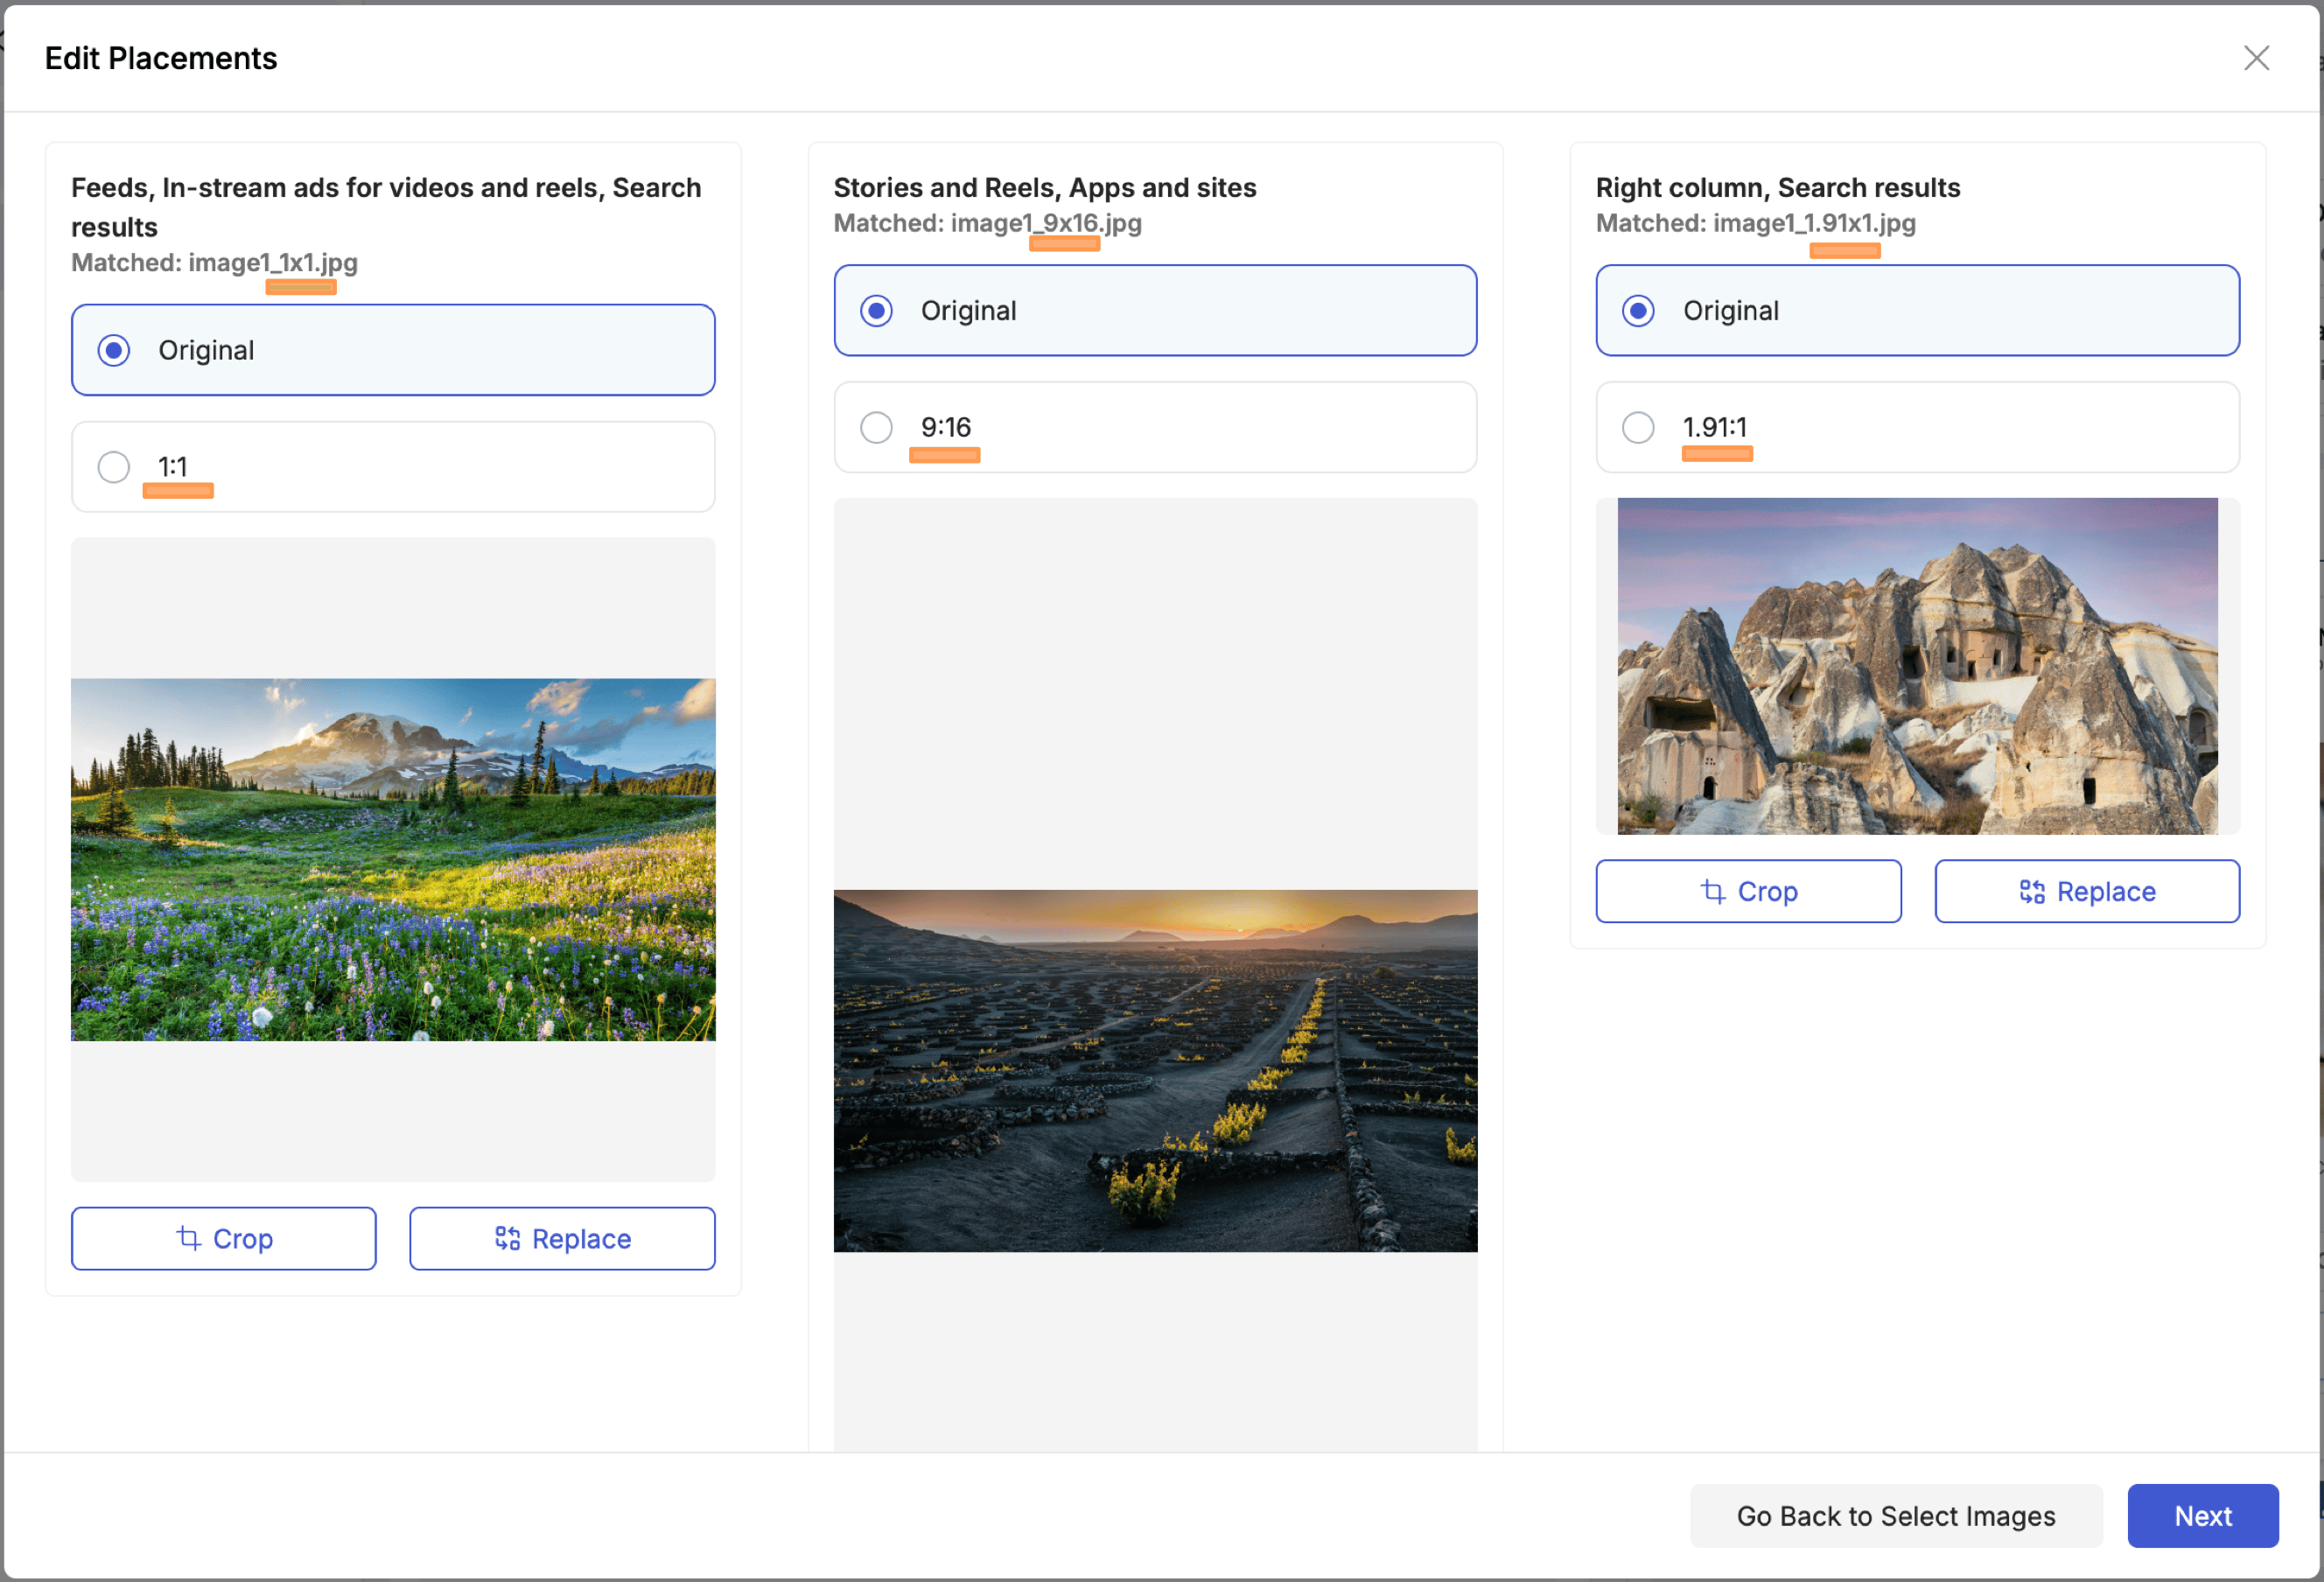
When you need different image crops for different placements (e.g., square for Feed, vertical for Stories, landscape for Right Column), you can have TheOptimizer assign them automatically based on the image filenames. Include the aspect ratio in each image’s filename before uploading:
In the Select Images dialog, enable the Auto-match by filename toggle at the bottom. When you click Next, TheOptimizer automatically assigns each image to the matching placement column based on the ratio in its filename.
Tagging Images from the Campaign Creator
You can tag uploaded images directly from the media browser inside the Campaign Creator — no need to go to the Creative Library first. After selecting the Uploaded Media tab in the Select Images dialog, click the # Add Tags button at the top right. Select the images you want to tag (or use “Select All”), choose your tags, and confirm. Tags are applied to the images in your Creative Library and will be available for filtering in future sessions.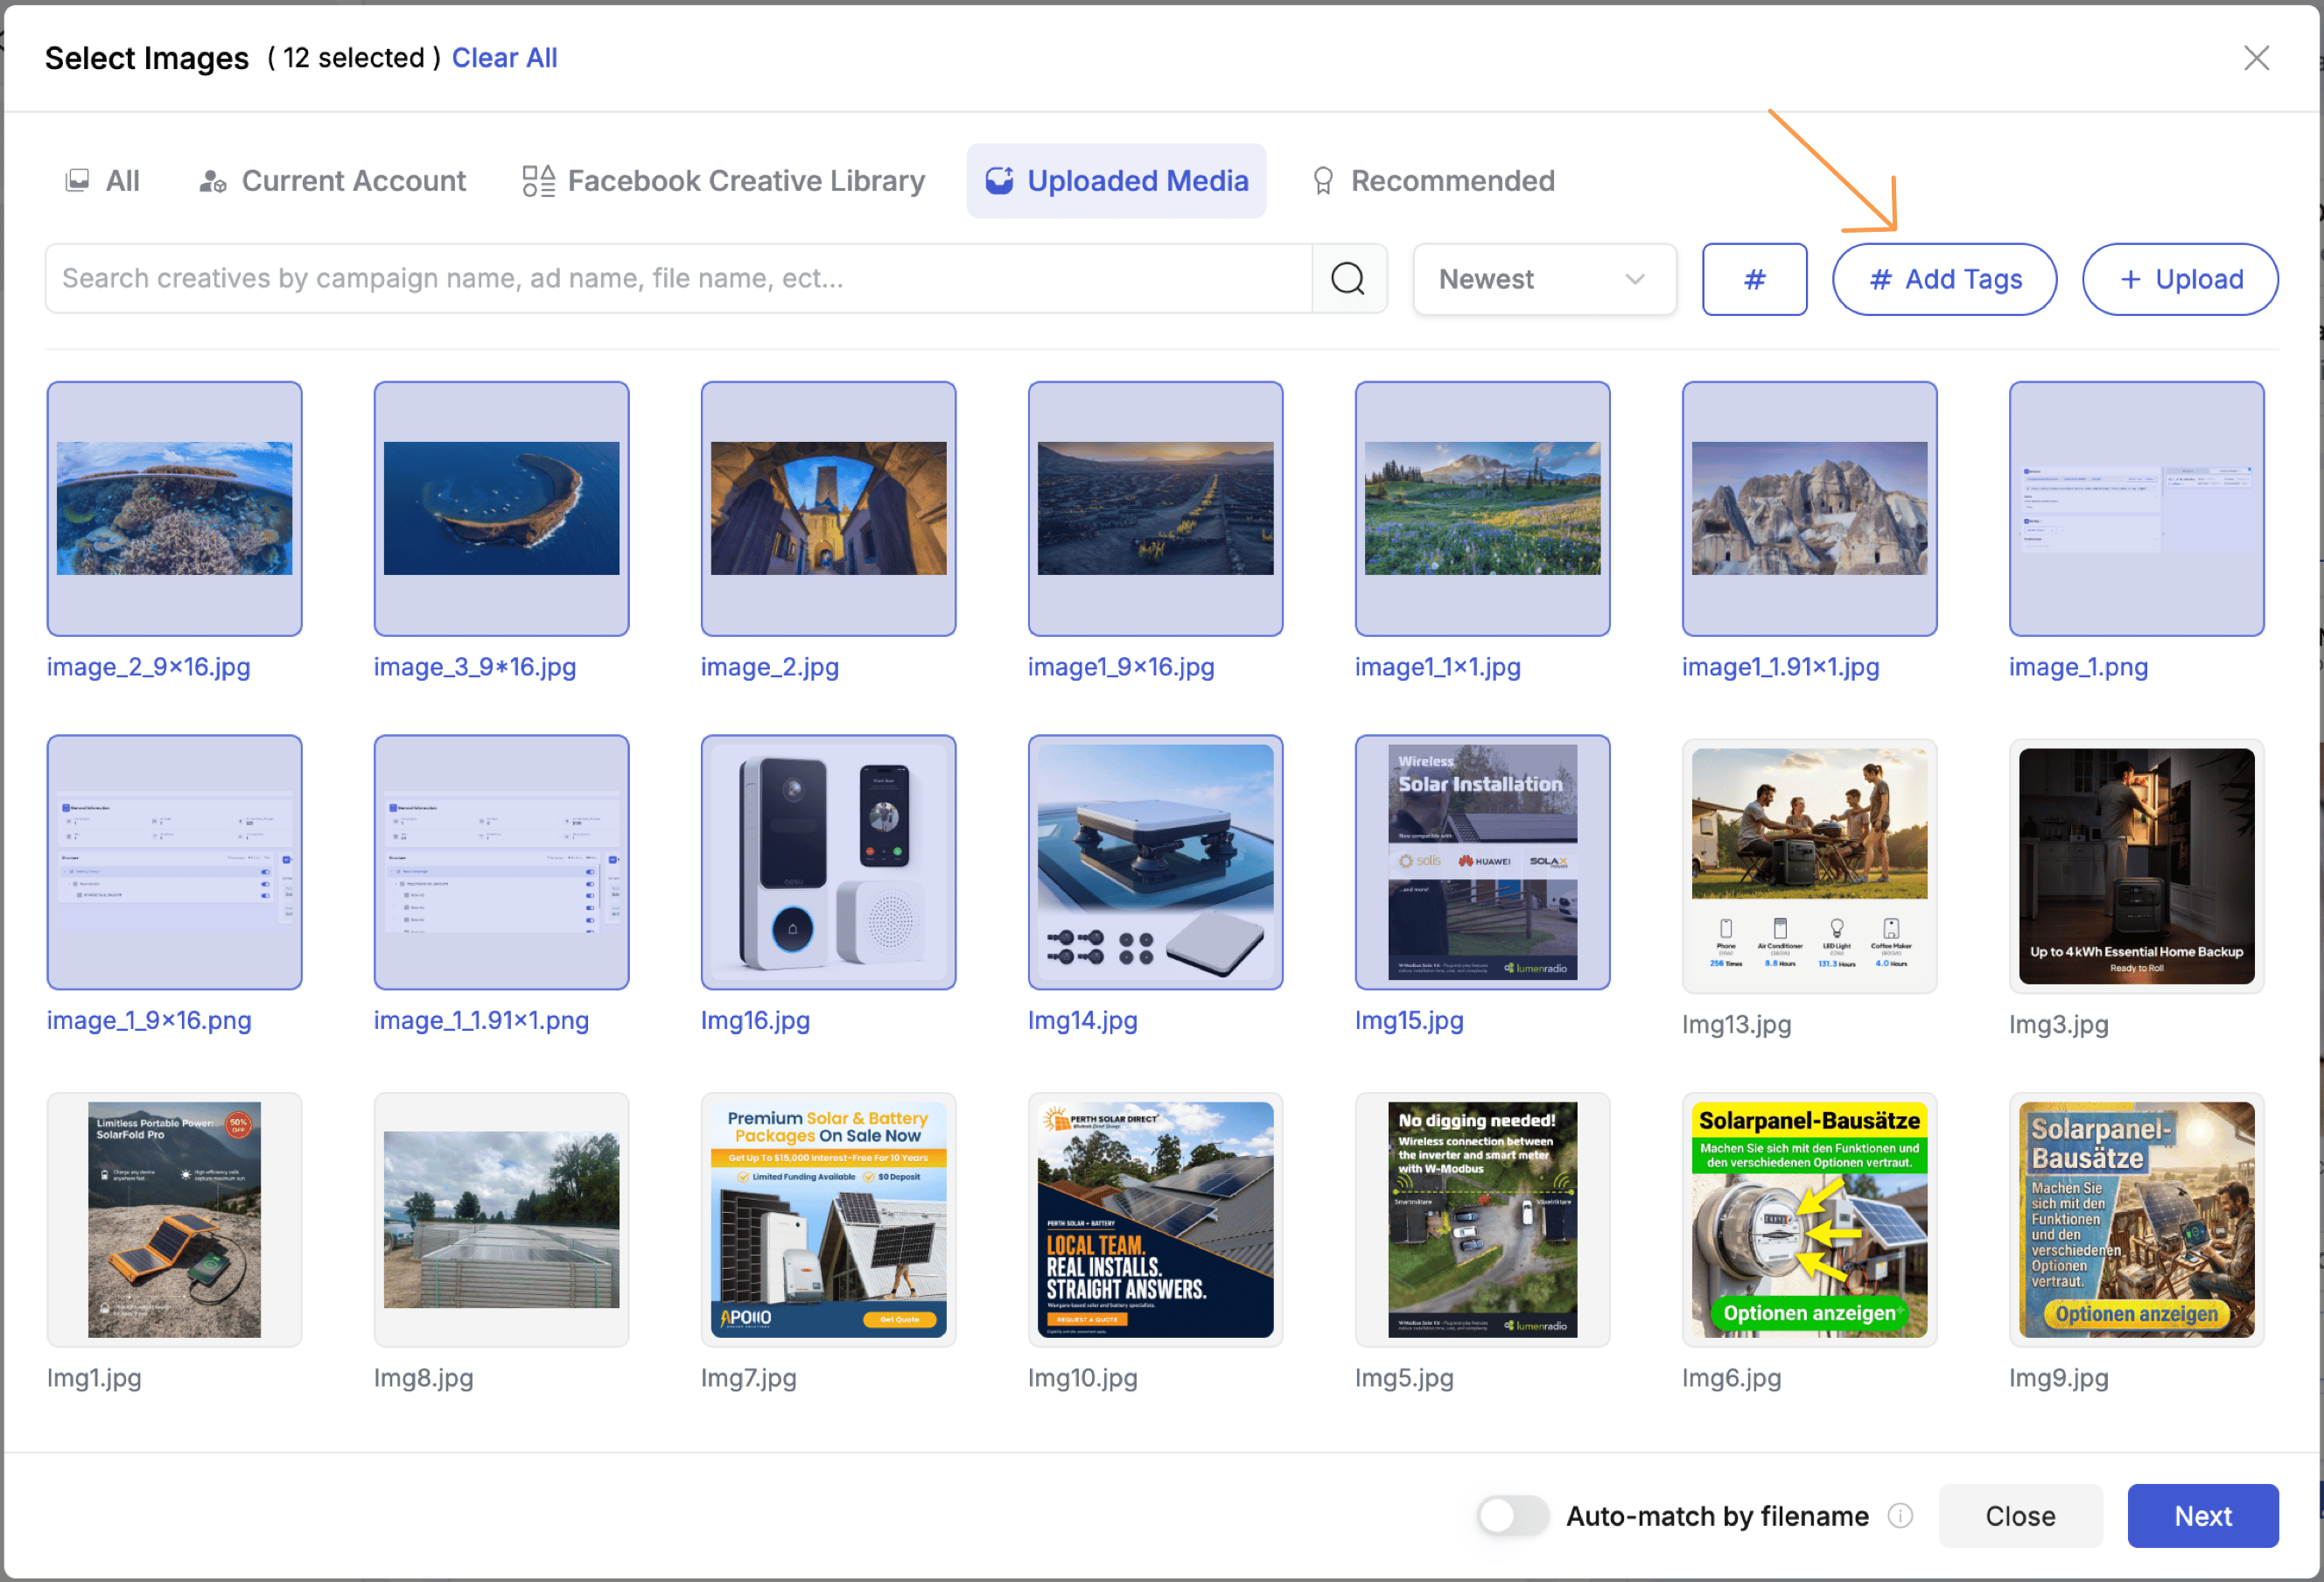
New Ad Formats: Catalog Ads and Flexible Ads
Two new ad format options are now available in the Ad Format selector. Catalog Ads — connects the ad directly to a Facebook Product Catalog. When selected, the media section is replaced with a catalog and segment selector — choose the catalog and the product set to use. The ad dynamically pulls images, names, and prices from your catalog. Flexible Ads — allows you to organise images into groups within a single ad creative. Each Creative group can contain a different set of images, and you can drag and drop images to reorder them within each group. This is useful when you want to test different image batches while keeping the same ad set structure.What Happens When You Upload Multiple Images
Every image or video you upload becomes a separate ad. If you upload 10 images, you get 10 ads. This is the simplest way to test multiple creatives — one ad per creative, all in the same ad set, sharing the same targeting and budget. The Variation Preview panel on the right updates in real time as you add media. Always check the totals before moving to the next step.Next: Generate Campaign Variations
Once your base campaign is configured, you can move to Generate Campaign Variations to multiply this structure into dozens or hundreds of campaigns using Groups, Restructuring, and Duplication.Structure your campaigns and ad sets before you configure them. The restructuring options — which decide how your ad sets and ads are distributed across campaigns — appear at the very top of Step 1, immediately after selecting your ad account and campaign name. It is worth reading the Generate Campaign Variations page before you start, so you can plan your structure upfront rather than needing to come back and adjust it later.