
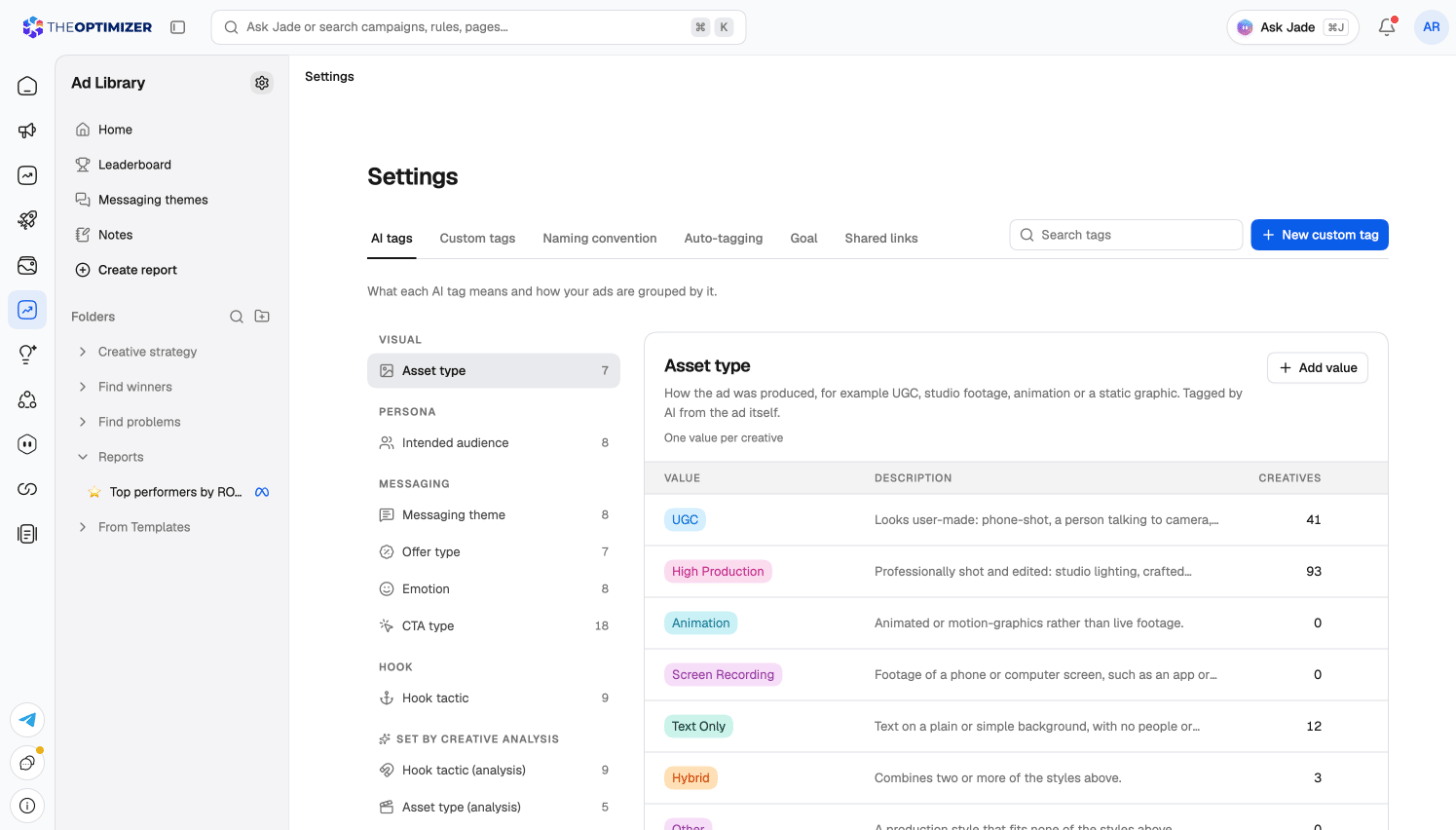
AI tags
AI tags are set by AI from the creative itself: it watches or reads each creative and tags what’s in it. The AI tags tab lists them in groups — Visual (asset type), Persona (intended audience), Messaging (messaging theme, offer type, emotion, CTA type) and Hook (hook tactic) — each with what it means, its values and how many creatives have each value. Use Add value to add a value the AI can pick. Tags listed under Set by creative analysis come from the AI analysis and can’t be edited here. You can also correct a tag on a single creative from the creative inspector. Creatives get AI tags when they’re analysed — automatically with auto-tagging, or one at a time with Analyse in the inspector.Custom tags
Custom tags label creatives your own way — by creator, product, funnel stage, or anything else your team tracks. You tag creatives by hand, and can filter and group reports by them.1
Create the tag
On the Custom tags tab, click New custom tag and give it a name, for example Funnel stage.
2
Choose how many values a creative can have
One value (one per creative, like a funnel stage) or Several values (like the products an ad shows).
3
Add the first values
Optionally type the first values, pressing Enter or a comma after each one, or paste a list. Then click Create tag.
Naming convention
If you already put information in your campaign, ad set or ad names — a creator, an offer, a date, a test ID — a naming rule turns those parts into labels you can filter, group and compare by. Nothing in your ad accounts changes.1
Start a rule
On the Naming convention tab, click New naming rule (or Set up a naming rule). Pick the platform and the name level to read: campaign, ad set or ad names.
2
Split an example name into parts
The rule shows one of your most-used names, split by its separator. Use AI detect to propose a whole rule from your names, or set the Separator and structure yourself.
3
Name the parts that matter
Give each useful part a name to turn its values into a label — or set it to Ignore. For a part with a fixed list of values, map each spelling in your names to the value it should show as, for example us → United States.
4
Save and review
Click Save rule. Every name is checked against the rule, and names that don’t fit appear under Needs review, where you can merge a misspelling into an existing value, add it as a new value, or map it.
Auto-tagging
Auto-tagging lets AI tag new creatives on its own as they arrive, so your reports and themes always have tags to group by.
The tab shows how many credits auto-tagging has used this month, and how much of your workspace’s AI credits are used overall.
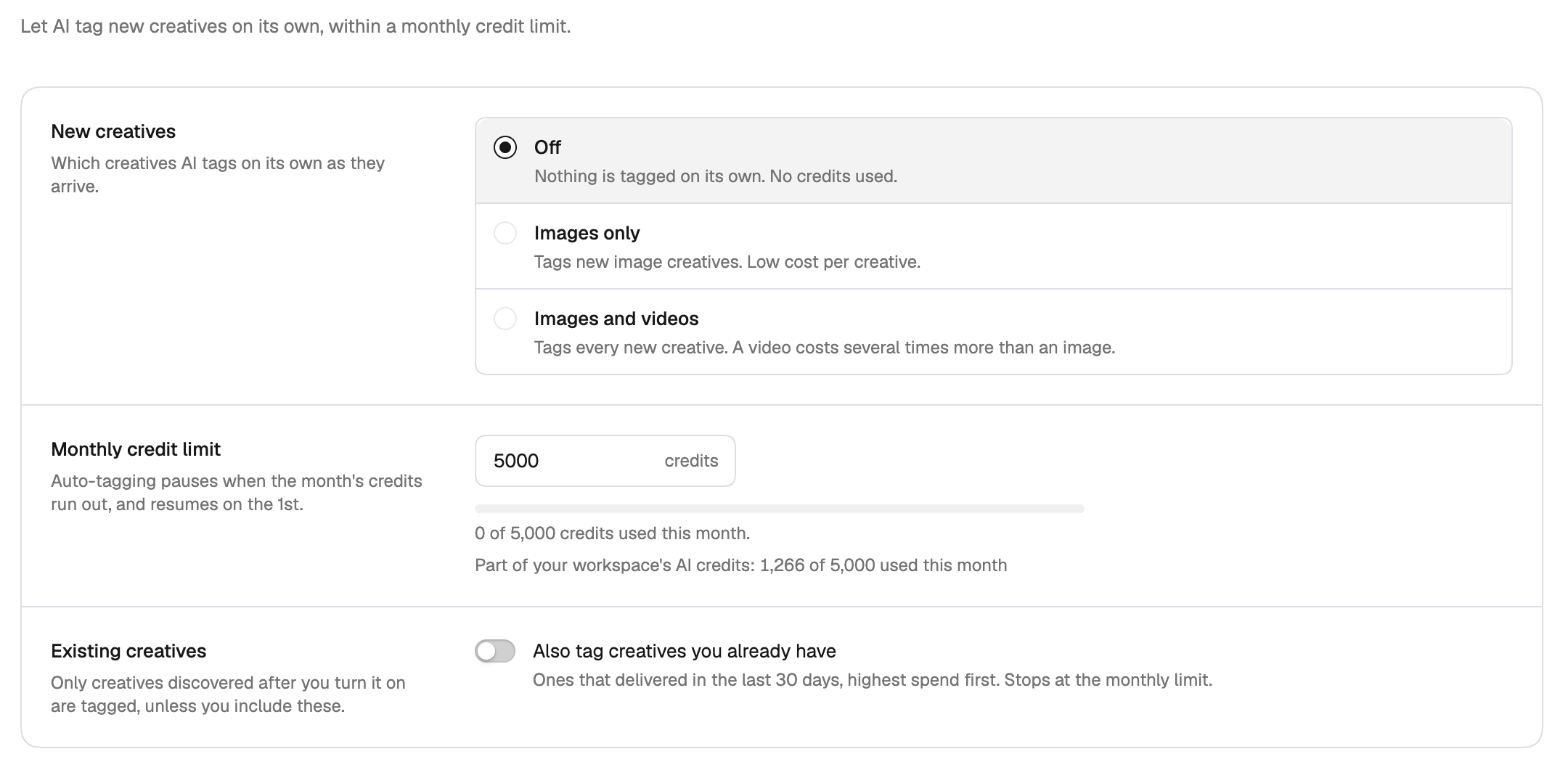
Only a workspace admin can change the auto-tagging and goal settings.
Goal
The goal is the metric that decides your top creatives and winners across the Ad Library — on Home, the leaderboard, themes and launch reports.- ROAS (ad platform) — revenue the ad platform reports, over spend.
- ROAS (tracker) — revenue your tracker reports, over spend. Use it when the platform doesn’t get all your revenue.